Profile and Security
Update or Reset Your Password
NOTE: If you are part of a larger law firm that has Admins handle your passwords for you, check with them first. They can tell you your password or reset it for you. Otherwise, you can reset your password yourself if you forgot it.
To reset your password, navigate from the left navigation “Account Settings” and right navigation “Profile & Security”. Click on the “Change Password” link as shown below:

If you can't login and need a new password, just go to the login page and click on the "Forgot password?" link as shown below:
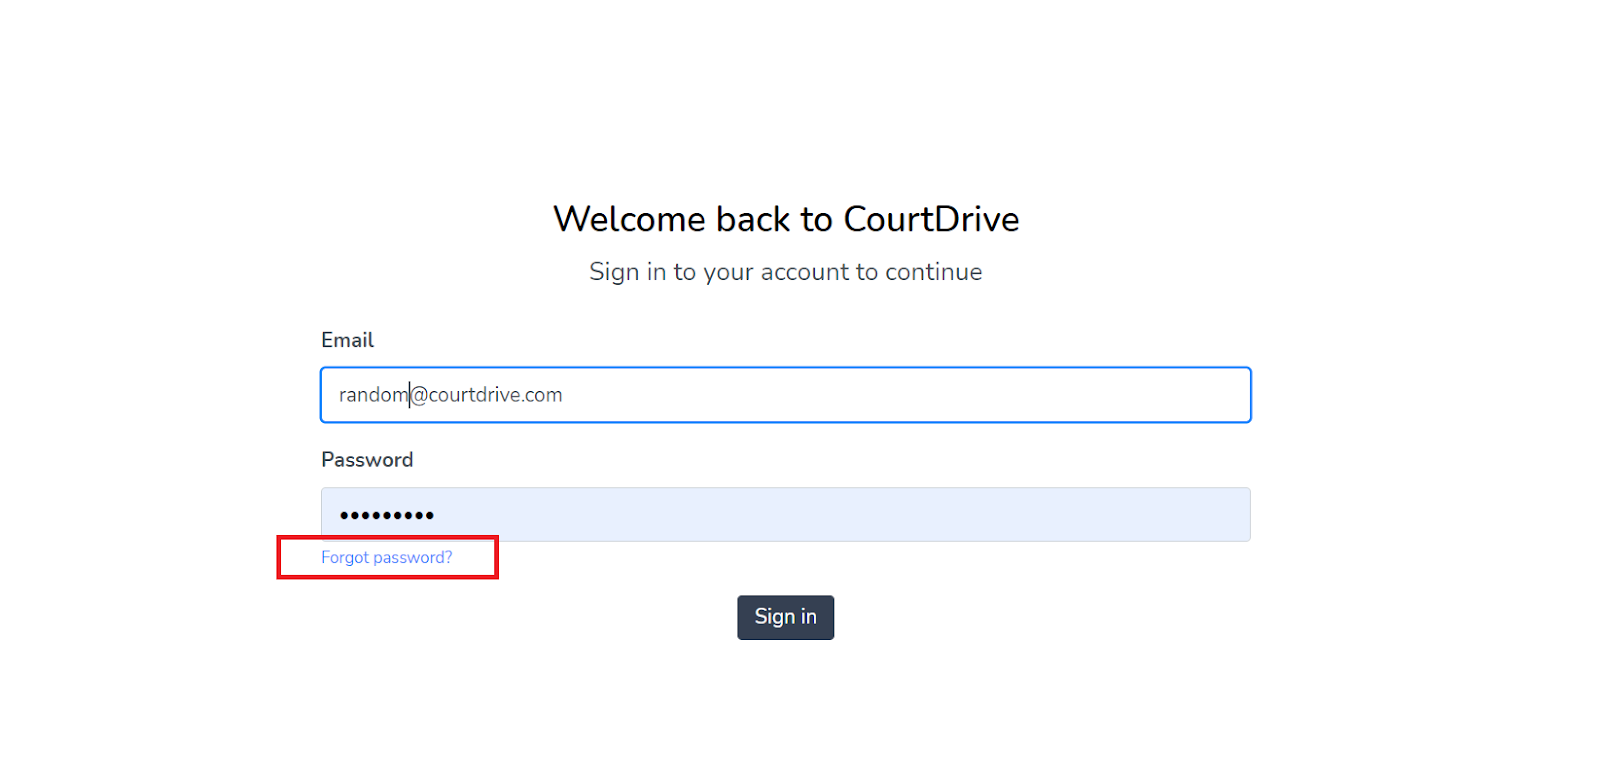
Then enter your email in the box that appears and click the "Send verification code" button. You will get emailed a code to enter and then reset your password.
If you do not receive the email in less than 5 minutes, please check your spam folder or ask your firm's network administrator.
Search & Download Preferences
To set your search preferences, navigate from the left navigation “Account Settings” and right navigation “Search & Download":
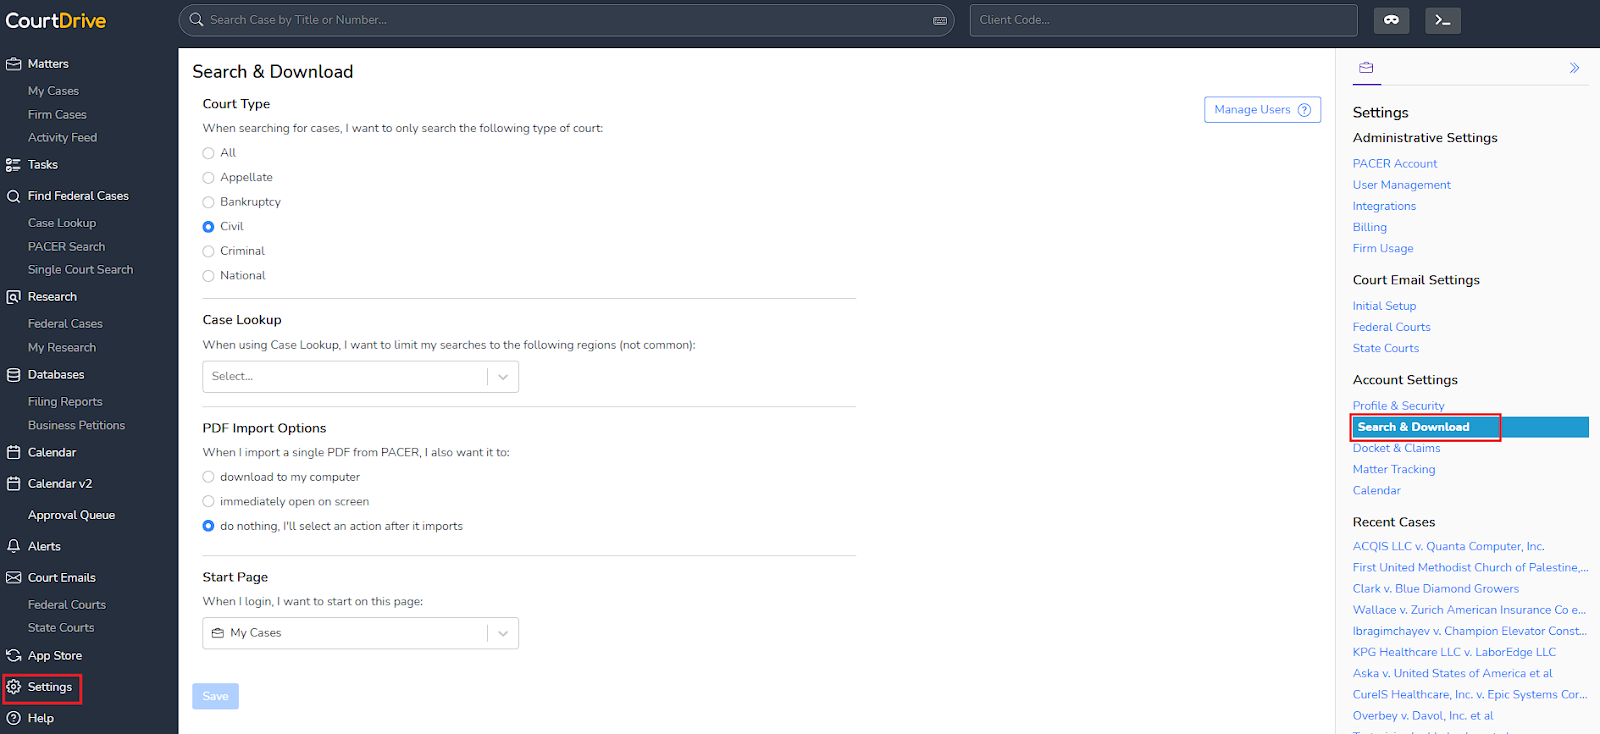
Whenever you search for cases, you can limit your results to the following types of cases:
- Appellate
- Bankruptcy
- Civil
- Criminal
- All
You can also select specific courts to always limit your search to those jurisdictions. However, this is not recommended if on occasion you will search for cases nationwide.
You can also set your immediate PDF import options when downloading from PACER. This will allow you to choose:
- Download to computer
- Immediately open on screen
- Do nothing (select action after import)
Dockets and Claims
Docket
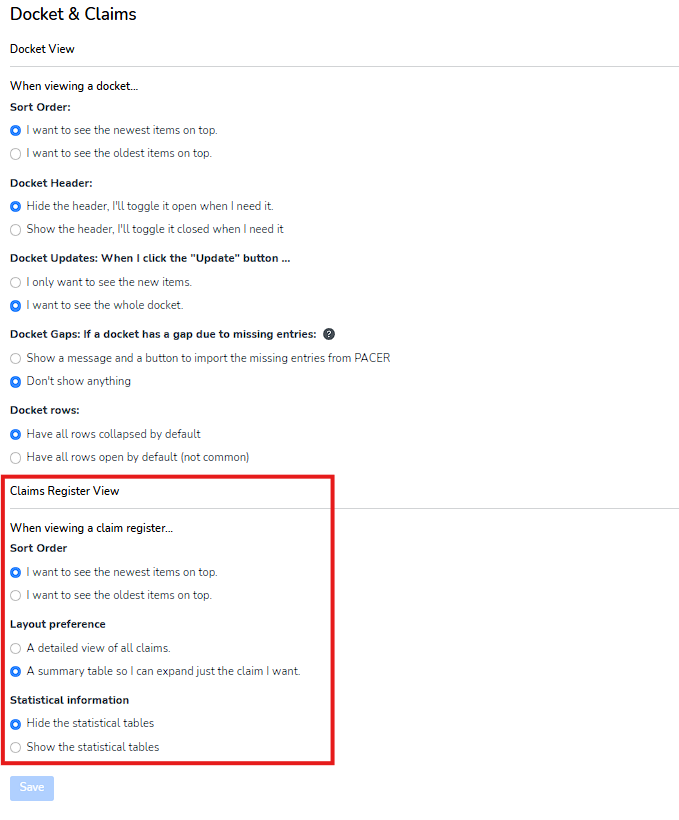
To set your docket and claims register, bankruptcy only, views, navigate from the left navigation “Settings” and right navigation “Dockets & Claims”.
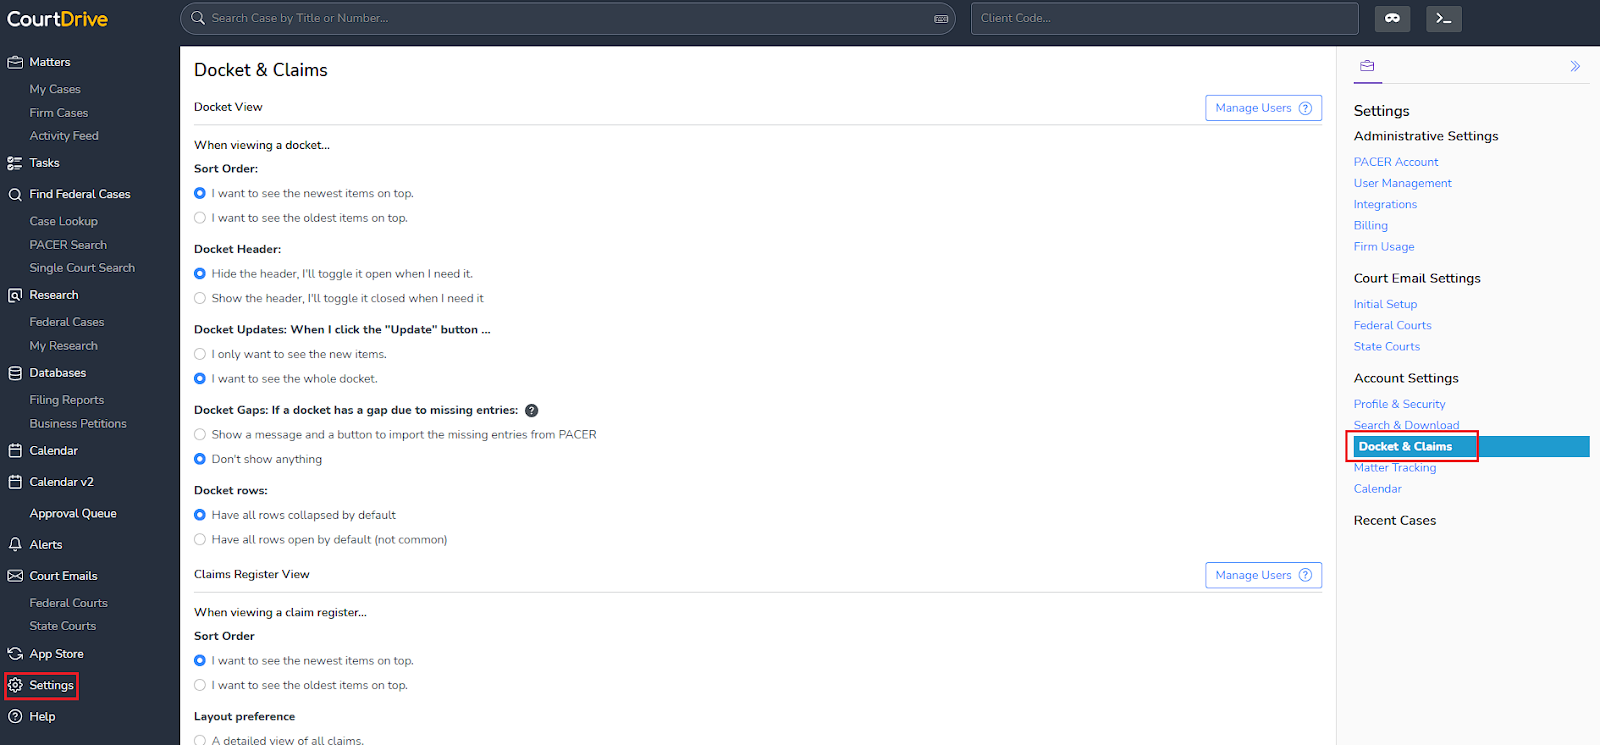
When viewing the docket sheet, you have a number of customization options as detailed below.
You can set your sort order by selecting either:
- Newest items on top
- Oldest items on top
You can choose to always show or hide your docket header.
Whenever you click the "Update" button from the docket, you can:
- See the new items.
- See the whole docket.
If the docket has a gap due to missing entries, you can:
- Show a message and a button to import the missing entries from PACER
- Don't show anything

Claims Register (bankruptcy only)
You can set the sort order when viewing a claim register:
- See the newest items on top.
- See the oldest items on top.
You can set your layout preference:
- Detailed view of all claims.
- Summary table so I can expand just the claim I want.
You can show or hide statistical information.
ECF Notices
If you have a CM/ECF filing account (typically owned by attorneys, creditors, and other claim filers), or if you are staff in charge of handling ECF notices for an ECF Filer, you may use an email on our system for the purpose of adding it to your CM/ECF account as an extra notice recipient.
Setting up CourtDrive to automatically handle all your ECF Notices is a simple 2-step process:
- Select a CourtDrive email
- Add the CourtDrive email to all your CM/ECF filer accounts.
Select CourtDrive Email
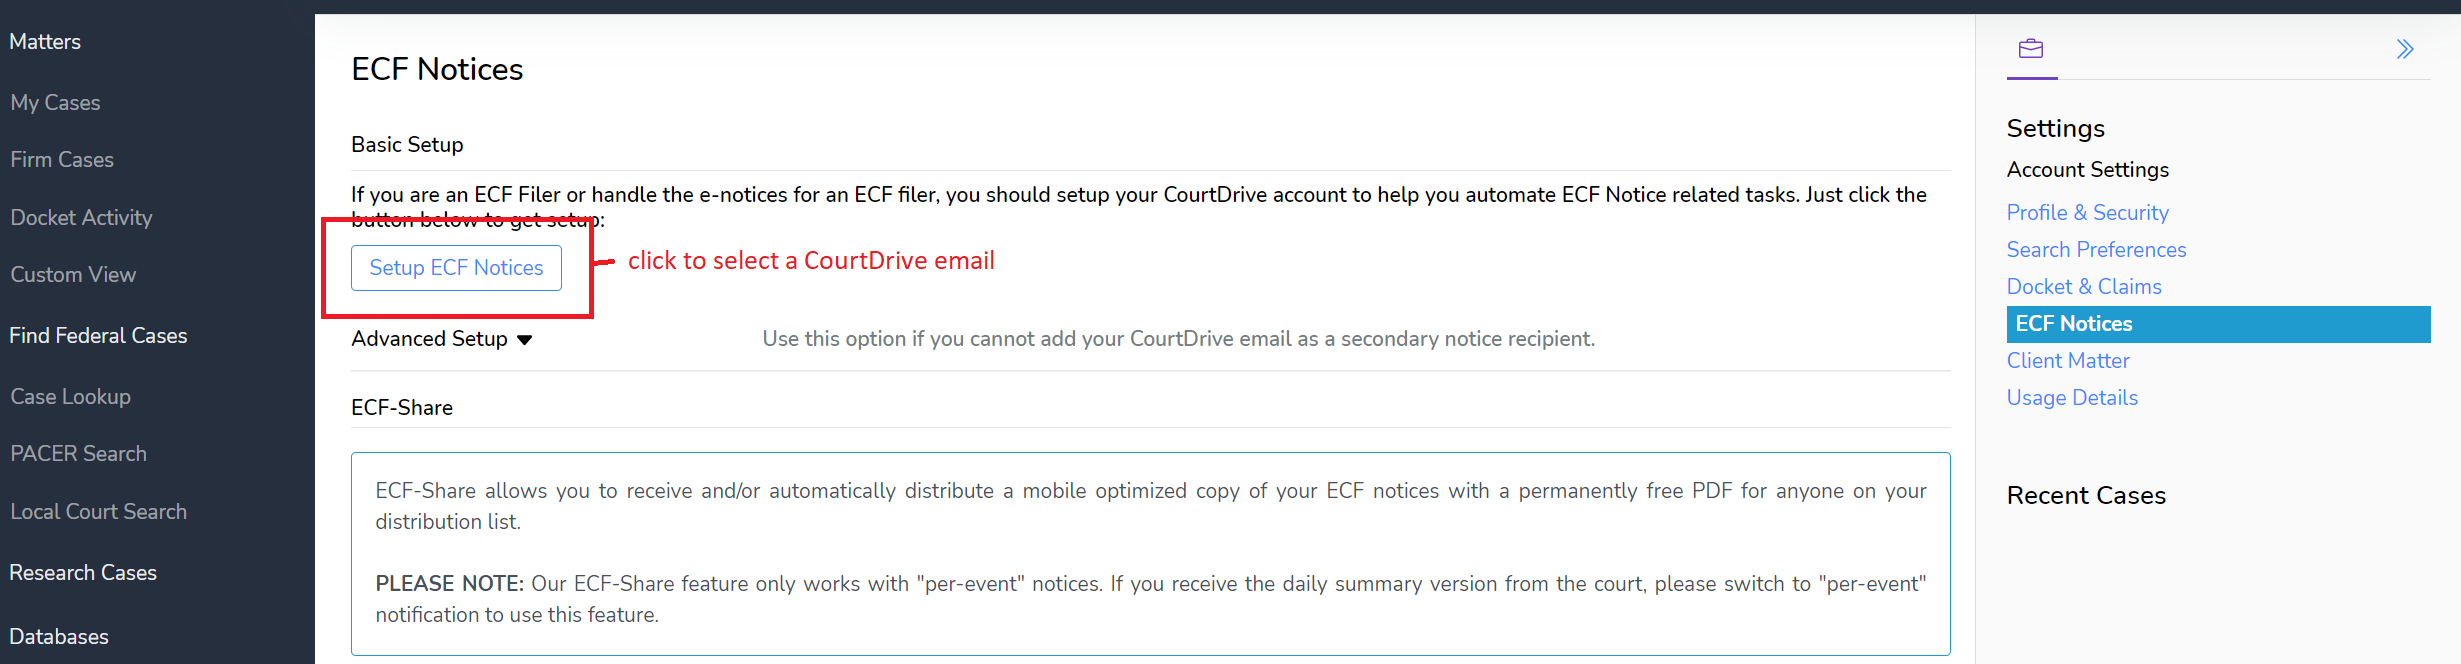
Click “Account Settings” on the left navigation and then “ECF Notices” in the right navigation.
Then, click the Setup ECF Notices button shown below (NOTE: The Administrator for your firm may have assigned you a CourtDrive email before you get to the following screen. If so, you will not have a button to click and may skip to the next step.):
You will be assigned a CourtDrive email to add to CM/ECF. If you want to change it, click the edit button as shown below:
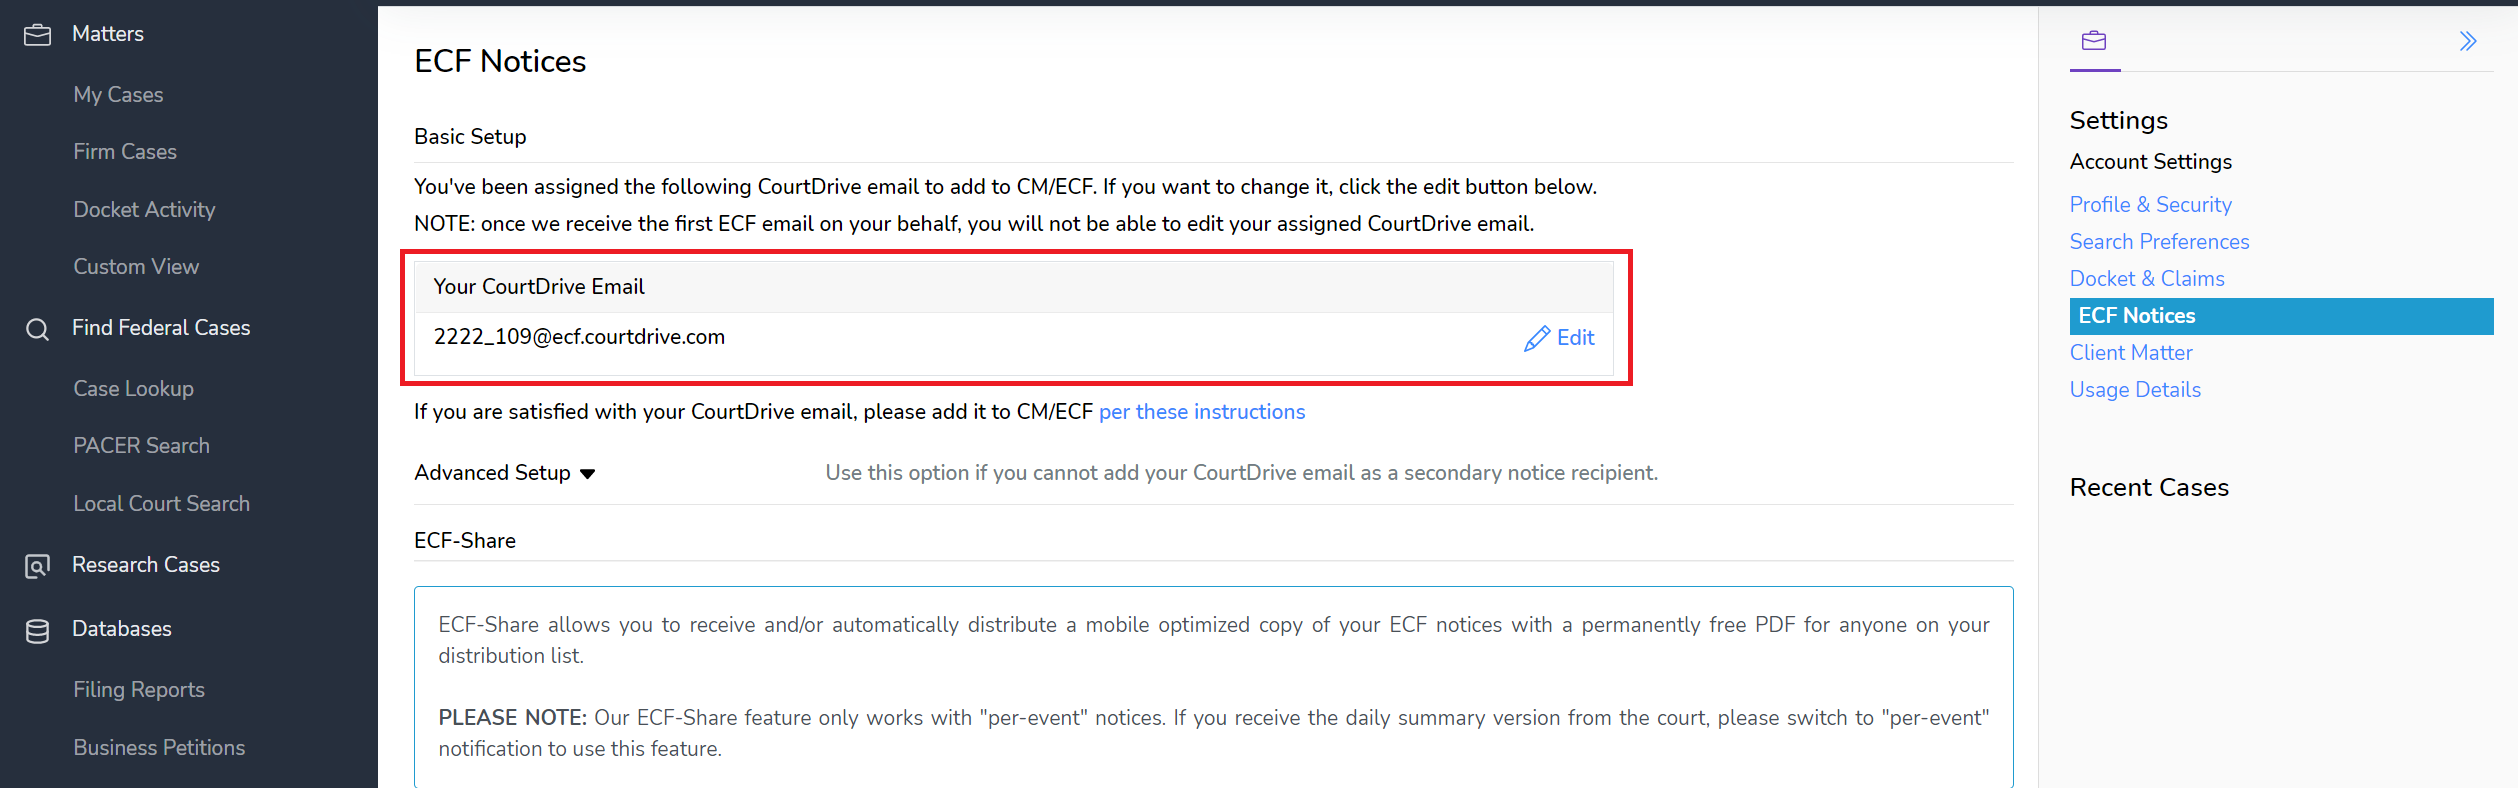
Once satisfied with your CourtDrive email (@ecf.courtdrive.com), you must add that email to your Court's CM/ECF system.
NOTE: once we receive the first ECF email on your behalf, you will not be able to edit your assigned CourtDrive email.
ECF-Share
ECF-Share allows you to receive and/or automatically distribute a mobile optimized copy of your ECF notices with a permanently free PDF for anyone on your distribution list.
PLEASE NOTE: Our ECF-Share feature only works with "per-event" notices. If you receive the daily summary version from the court, please switch to "per-event" notification to use this feature.
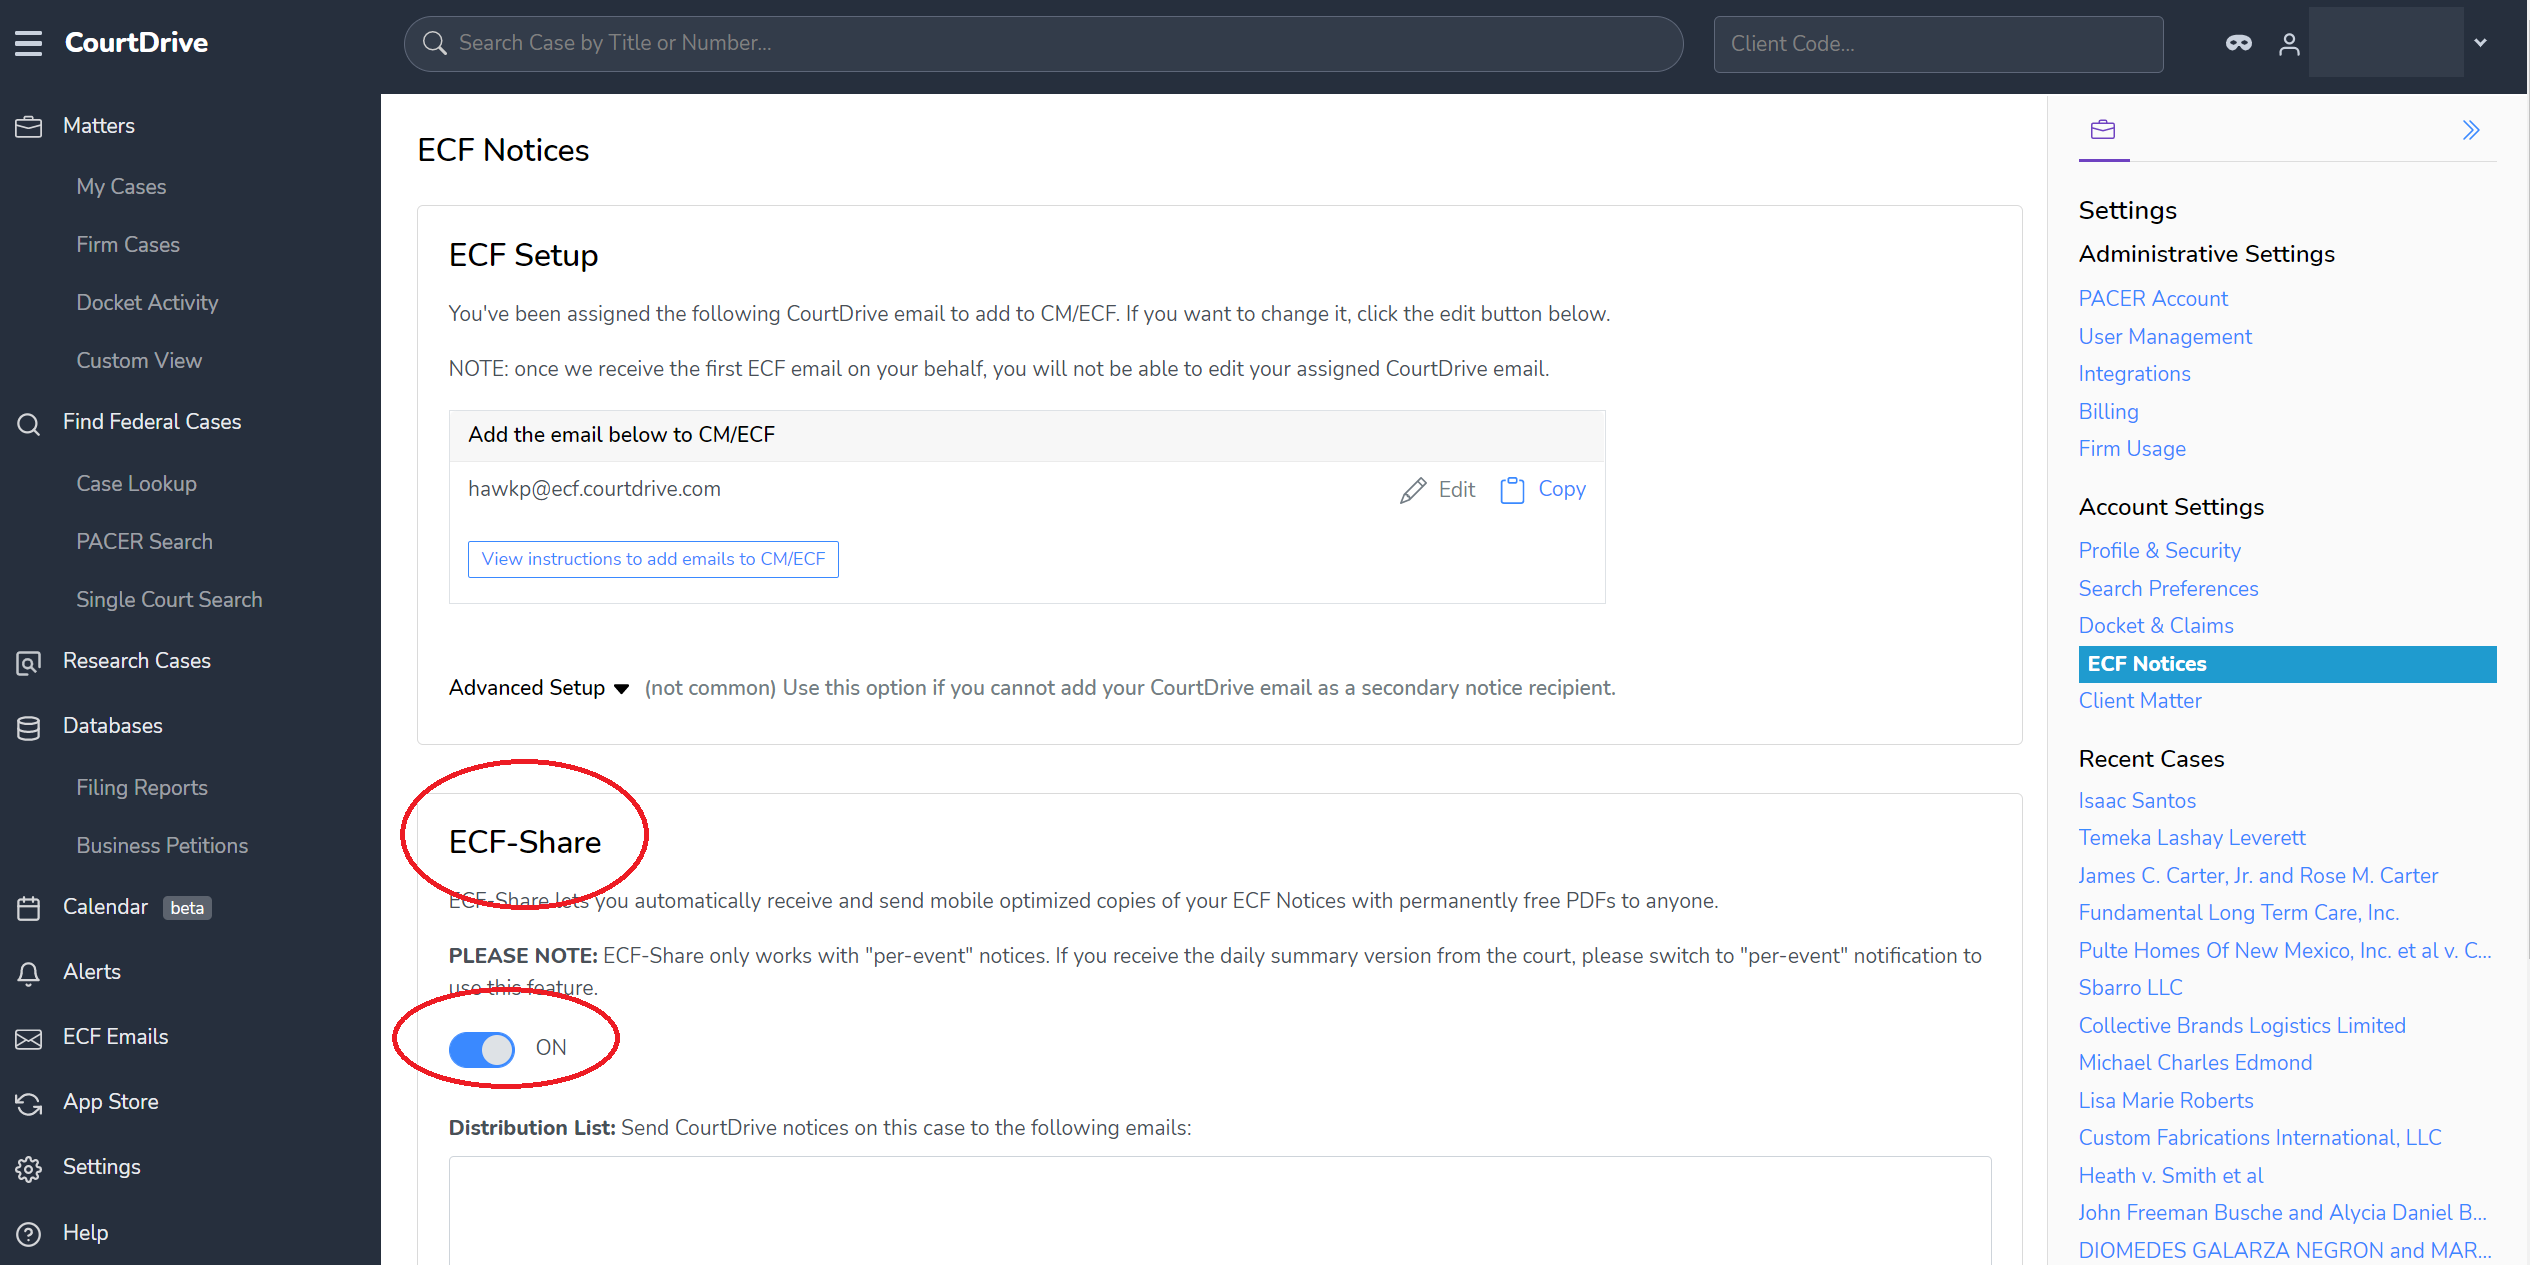

Thereafter, decide who in your firm should receive the notices by setting up an internal distribution list.
Later we will show you how to setup a distribution list "per case" so you can add external parties (such as clients or opposing counsel) to a specific case. Do not external parties to your account settings here because any email you add here will receive copies of everything on all your cases.
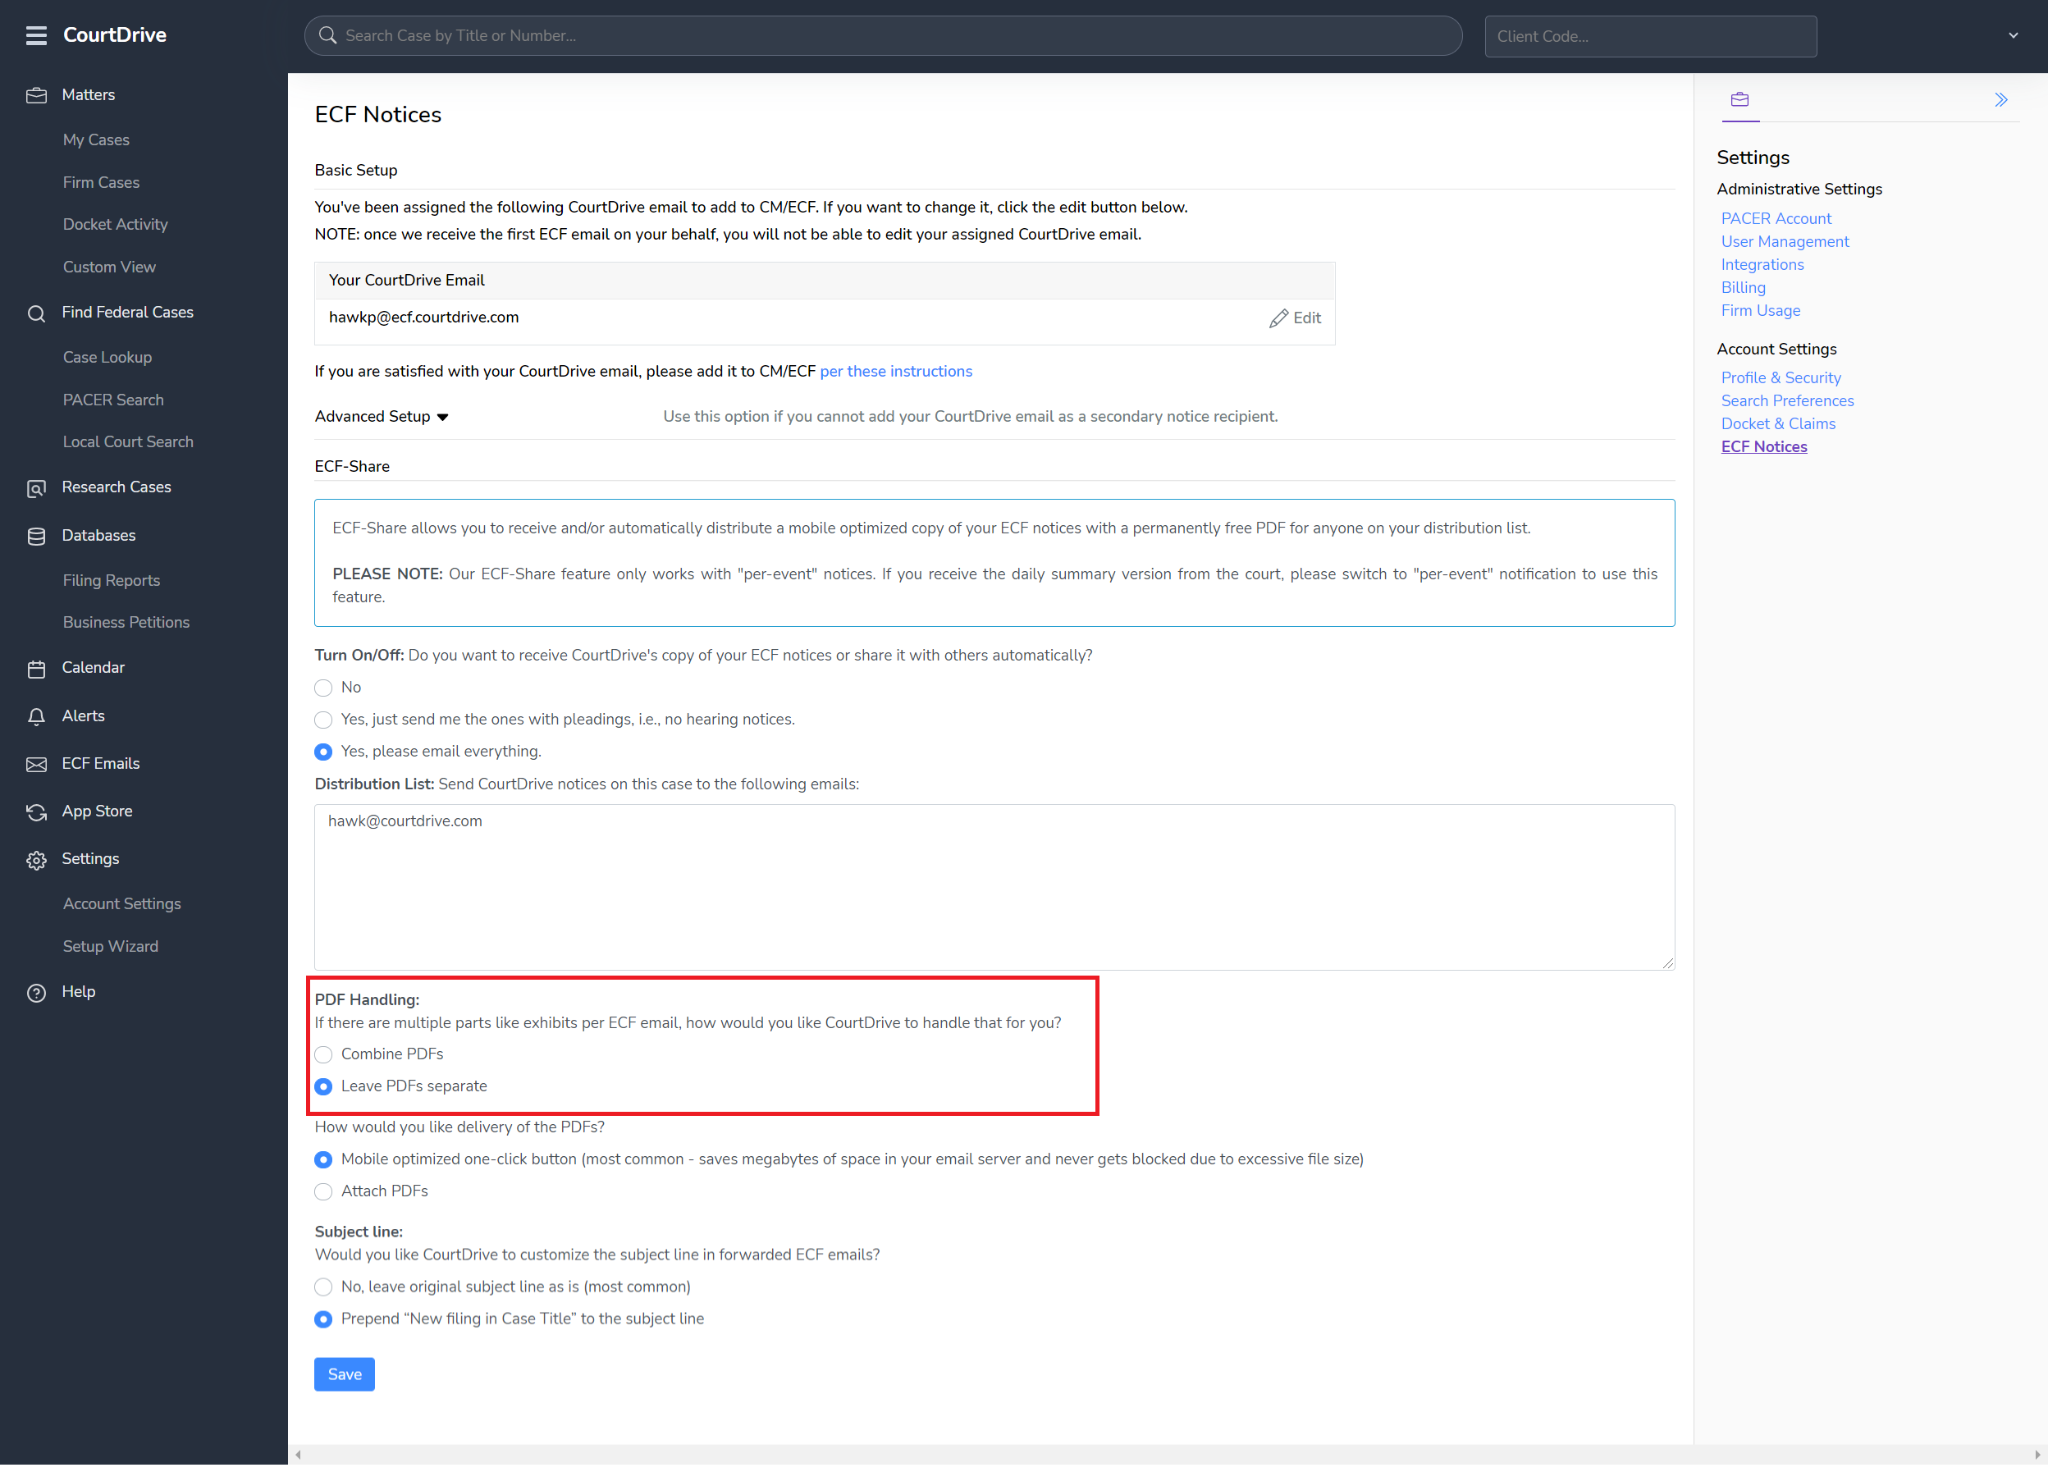
CourtDrive also has different PDF handling options if there are multiple parts like exhibits per ECF email:
- Combine PDFs
- Leave PDFs separate
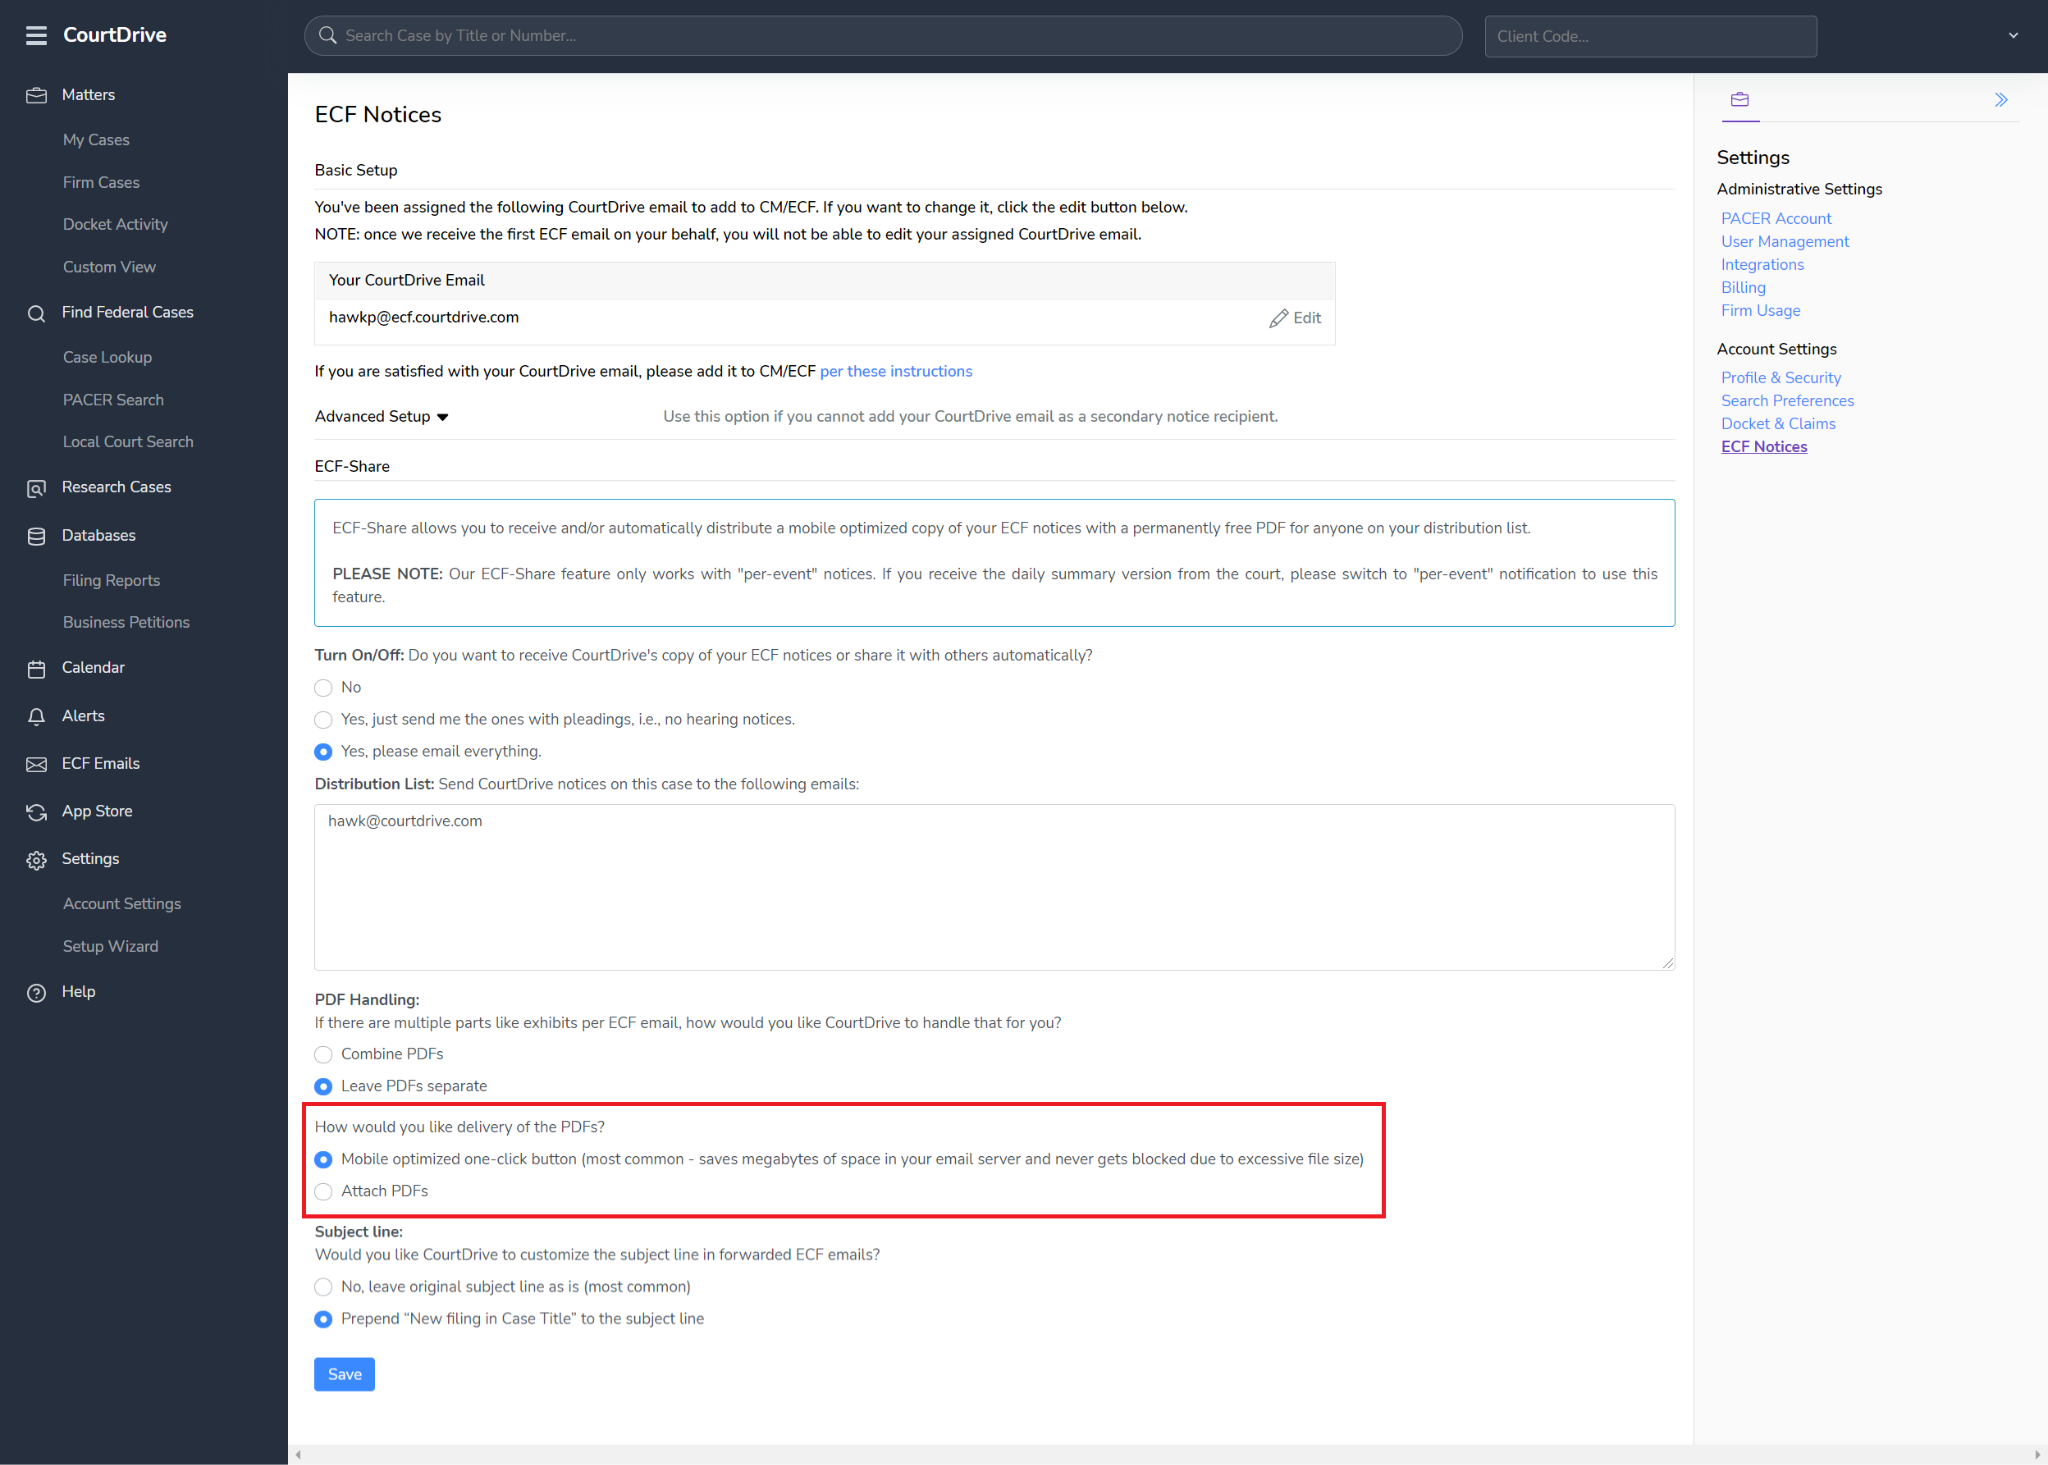
You can also select how you would like delivery of the PDFs.
We recommend mobile optimized one-click button (most common - saves megabytes of space in your email server and never gets blocked due to excessive file size). You can also select to attach PDFs.
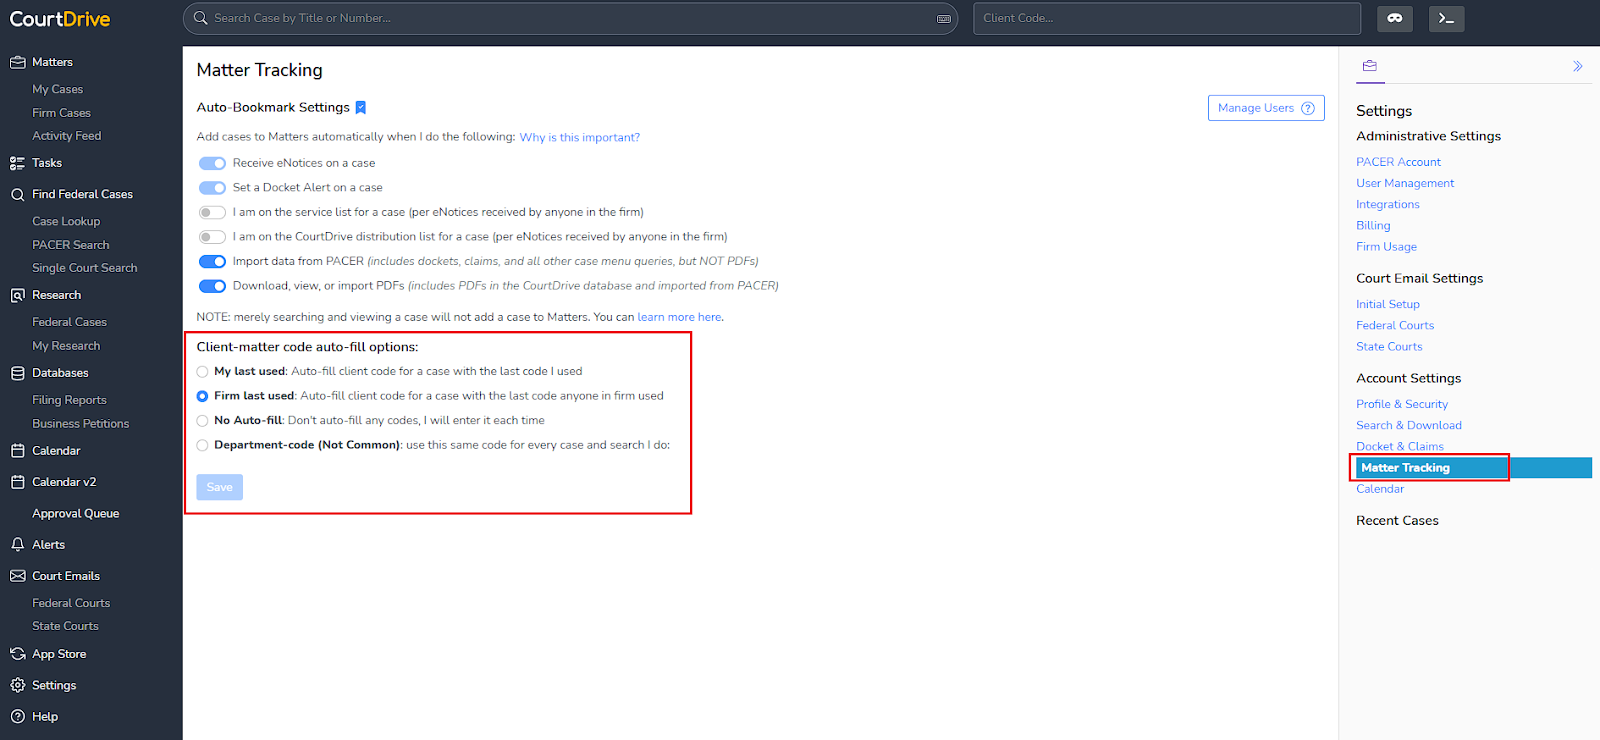
Client Matter
If your firm uses client-matter codes, you can select among the following auto-fill options:
- My last used: Auto-fill client code for a case with the last code I used
- Firm last used: Auto-fill client code for a case with the last code anyone in firm used
- No Auto-fill: Don't auto-fill any codes, I will enter it each time
- Department-code:(Not Common): use this same code for every case and search I do
-