Selecting Cases
By default, the events displayed on the CourtDrive calendar will reflect all the firm's cases. If you want to limit that to only your cases, or just to a single case, you may make such a selection from the top row of the calendar:
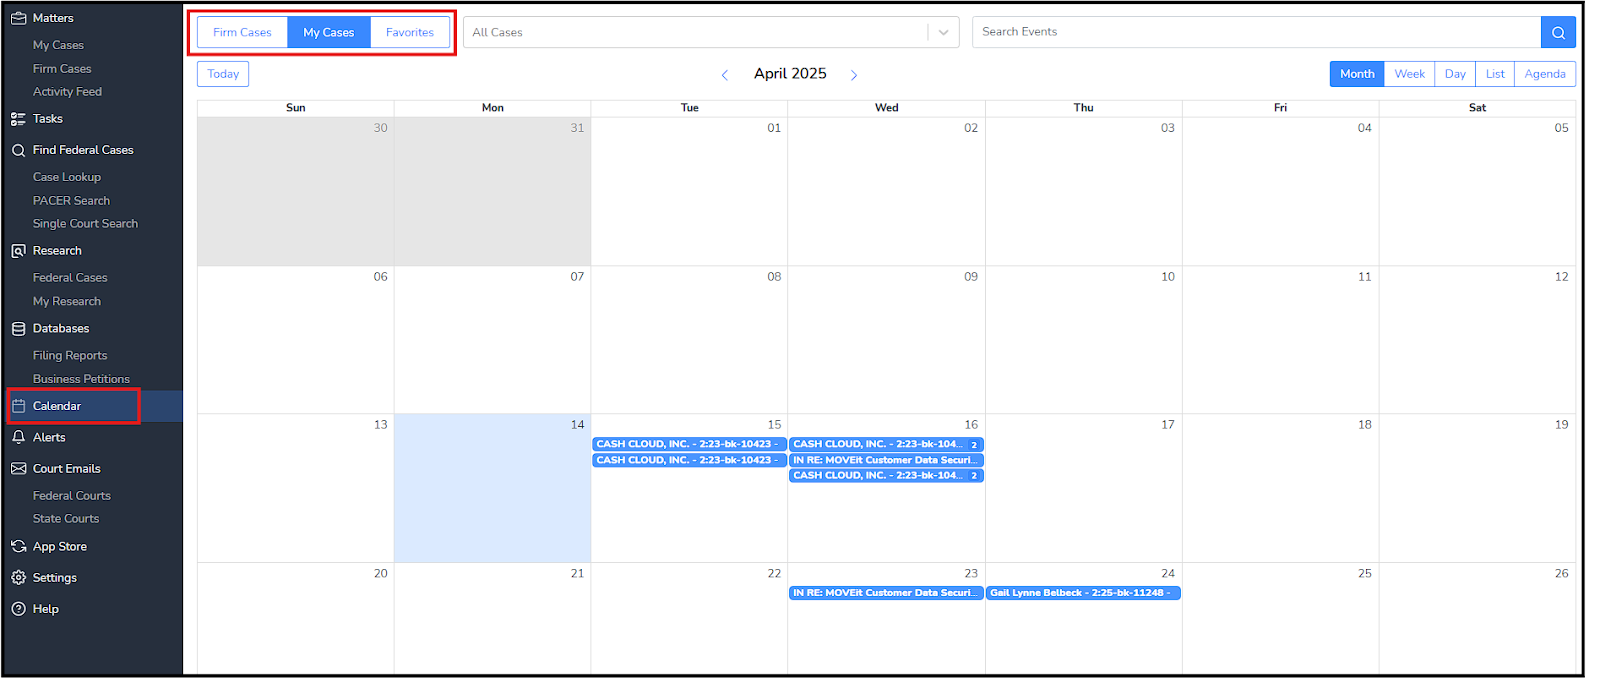
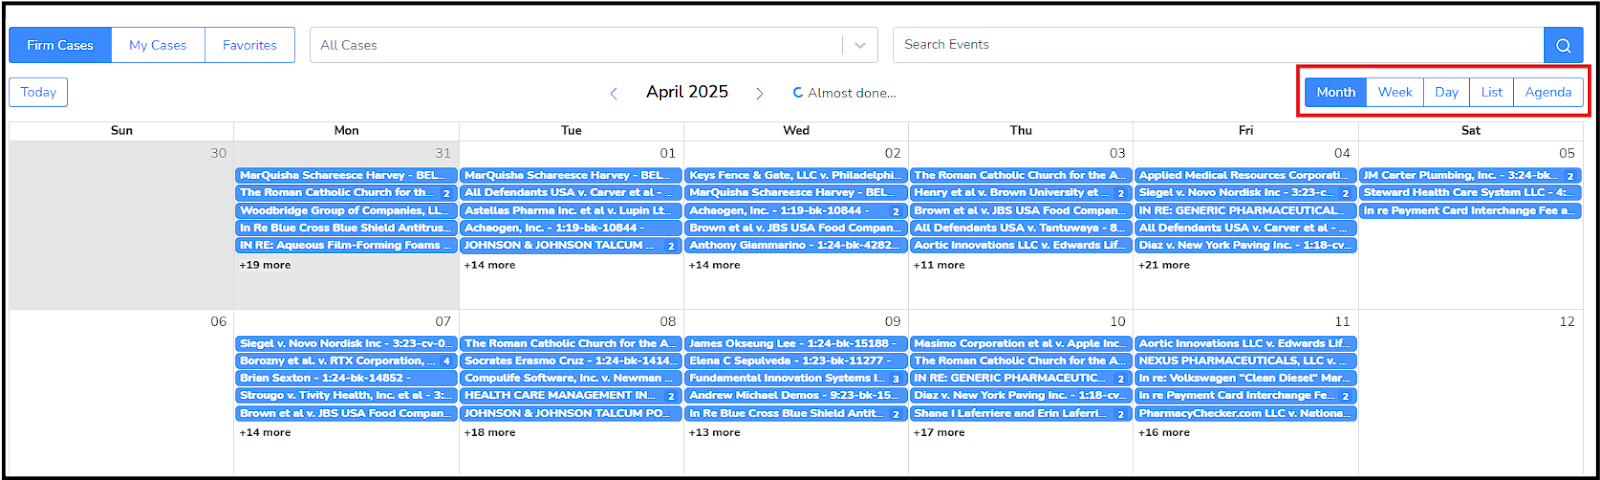
Viewing Dates
You can select among Month, Week, Day or List views here.
From the List view, you can bulk select events to add to your calendar.
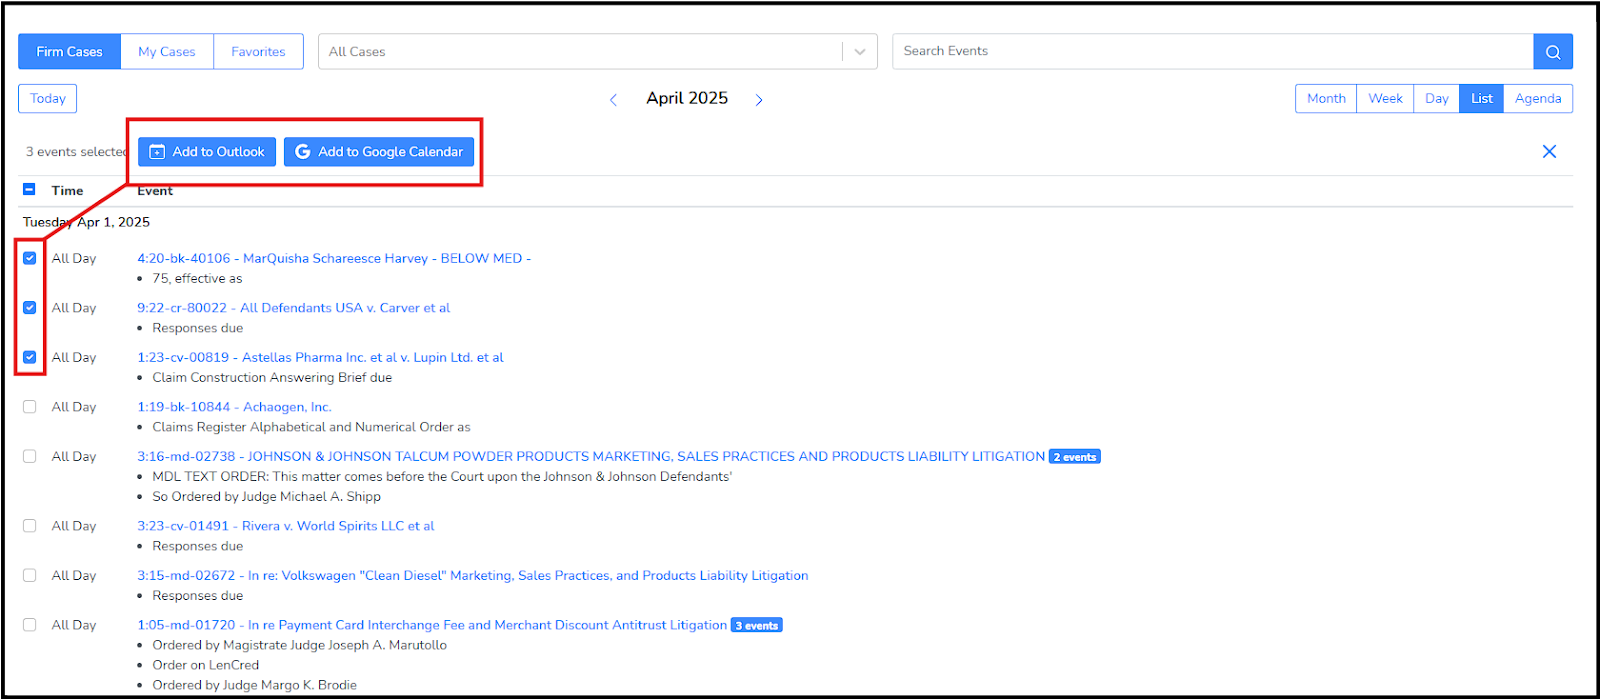
From each event, you can click through to add to your Outlook or Google calendar.
AI Docketing Assistant
Learn about the different calendaring features CourtDrive offers.
Calendar Settings
After connecting your calendar app, you’ll need to configure how CourtDrive sends events to your calendar.
Step 1. Select Your Primary Calendar
Once your calendar is connected, choose which available calendar will serve as the firm’s Main Calendar.
- All approved events will be added to this calendar by default.
- You can later configure events to also be sent to specific case teams or linked matters (see below).
Step 2. Choose How Events Are Added to the Calendar
Select how CourtDrive should handle incoming events. We offer three options:
Add approved events only (recommended)
- Works for both State and Federal cases
- Events are routed through the Approval Queue
- Gives you full control over what gets calendared
Add events only from specific cases
- Works for Federal cases only
- Users select which cases should automatically send all Federal docket dates to the calendar
Add events from all Firm Cases
- Works for Federal cases only
- Automatically adds all Federal docket dates for all firm cases
Step 3. Customize Event Appearance
Configure how events appear on your connected calendar, including naming and formatting preferences.
Approval Queue
The Approval Queue is where users review, edit, and approve events before they are sent to the calendar.
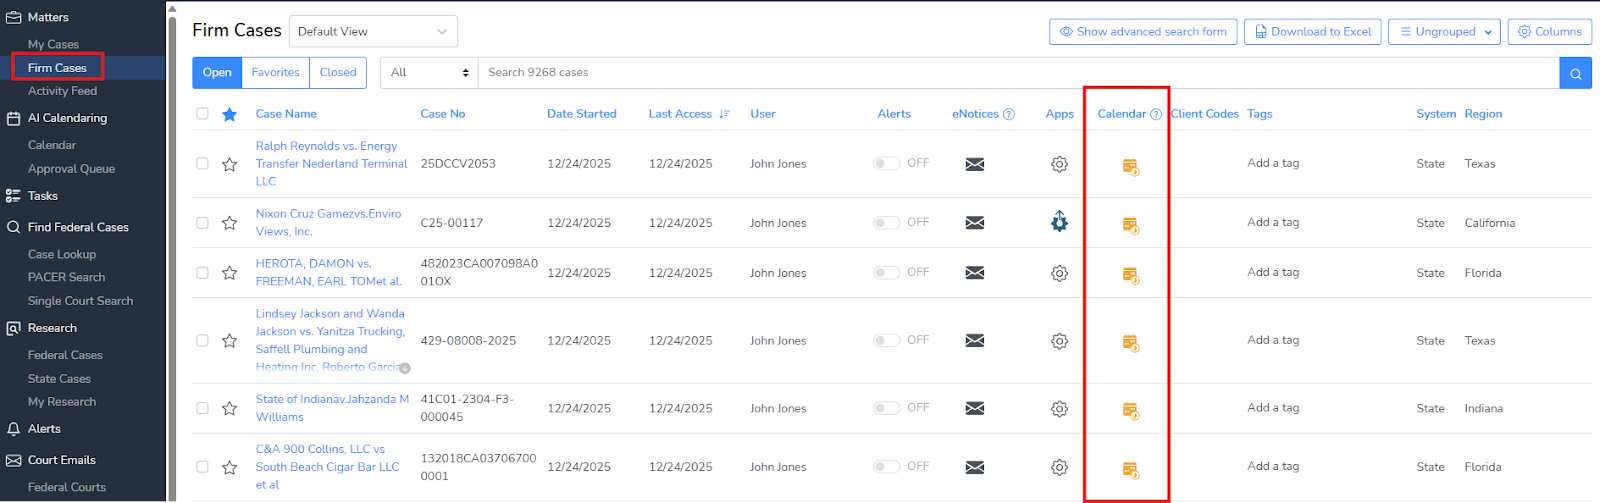
Once calendar integration is enabled:
- All Firm Cases will display a calendar icon in the calendar column
- This indicates the case is actively sending events to the Approval Queue
- Admin users can disable calendaring for individual cases if needed
Any user can access the Approval Queue from the left-hand navigation menu.
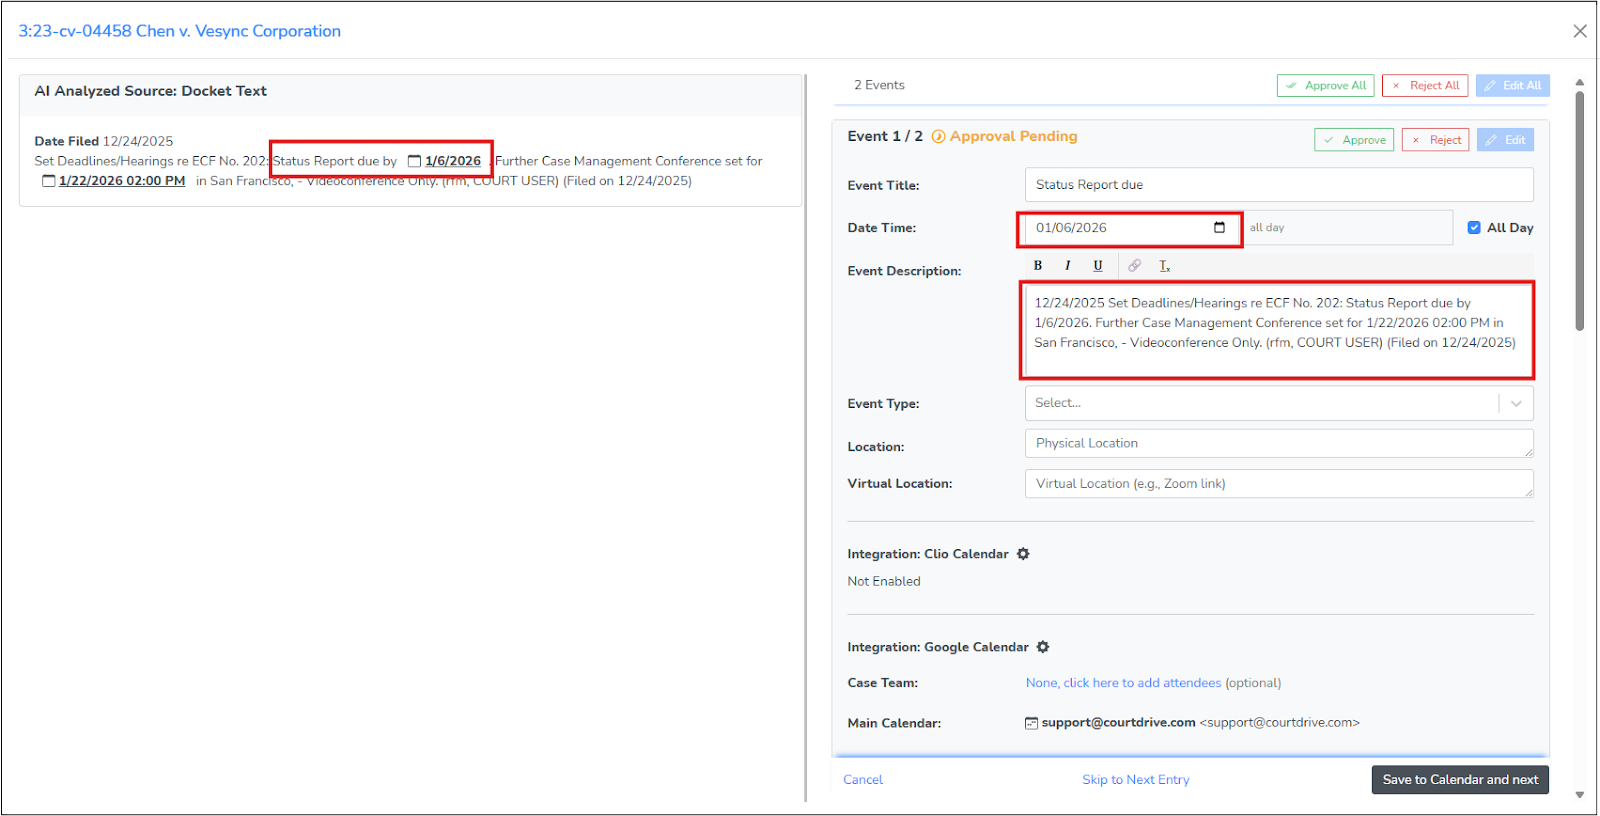
Reviewing Events
In the Approval Queue:
- Click an event in the Event Status column to open it
- Each event is sourced from either:
- A Federal docket, or
- A State court PDF
- A Federal docket, or

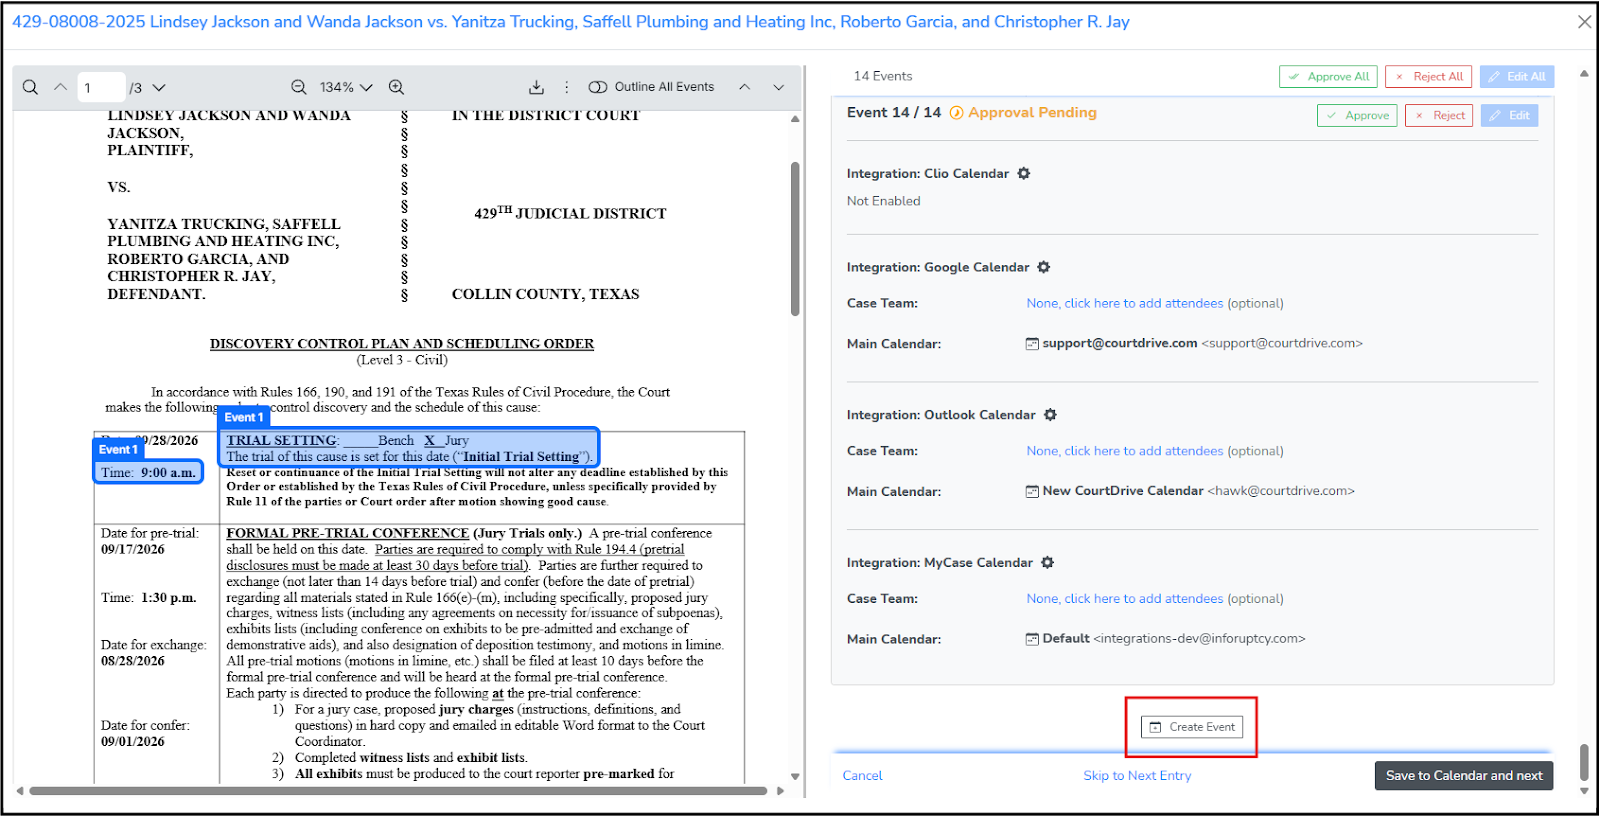
When opened, the event details appear in a side-by-side view, showing the source content alongside the extracted event information.
- All fields are fully editable
- Users can correct or refine event details before approval
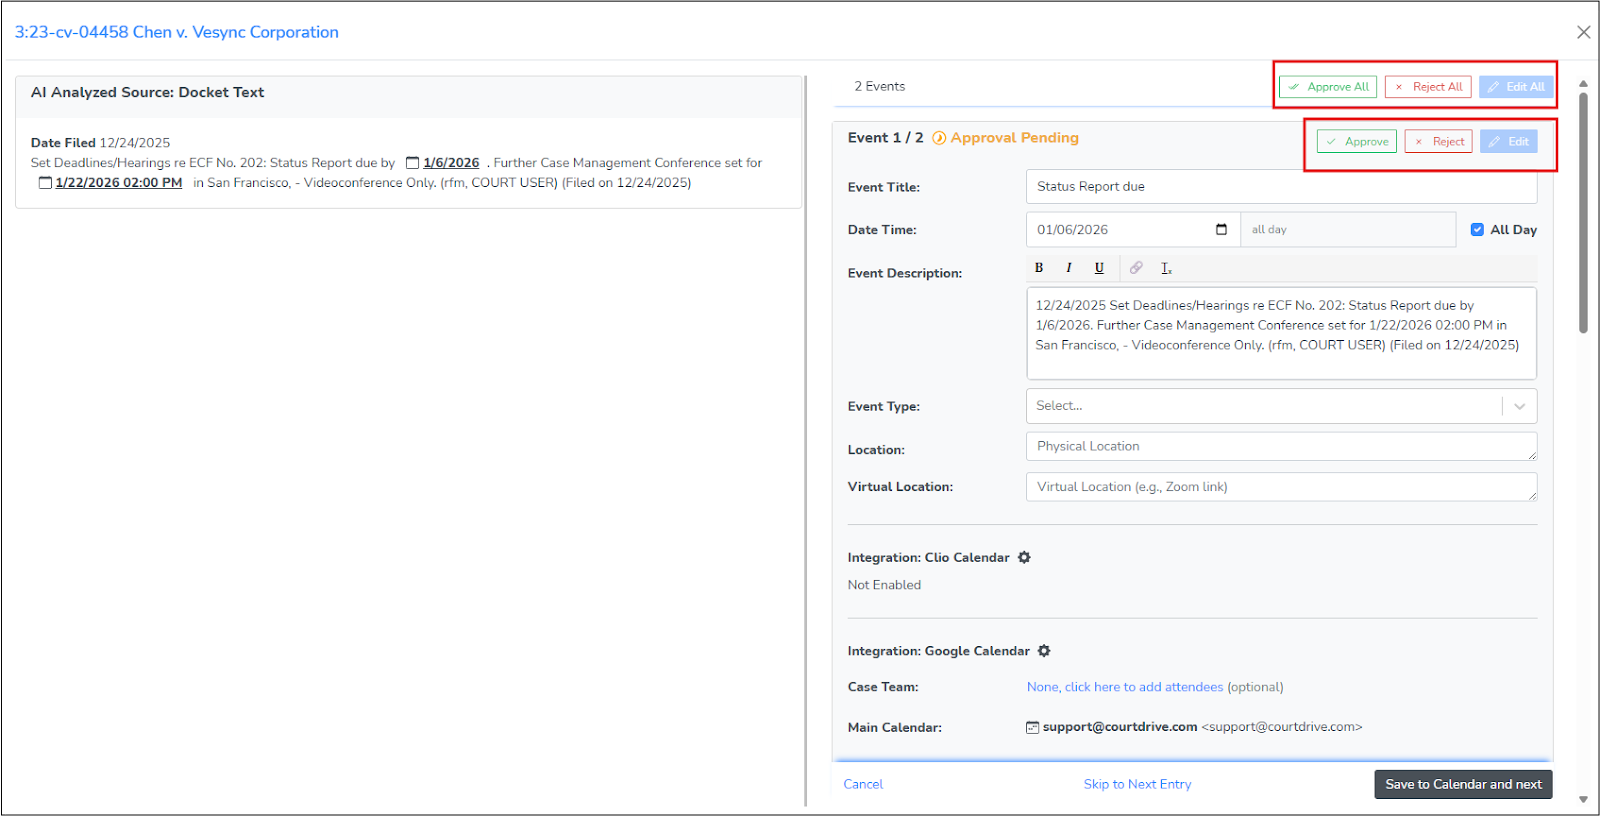
Users may then:
- Approve the event to send it to the calendar
- Reject the event to prevent it from being calendared
Saving Events
After reviewing events:
- Click Save to Calendar and Next
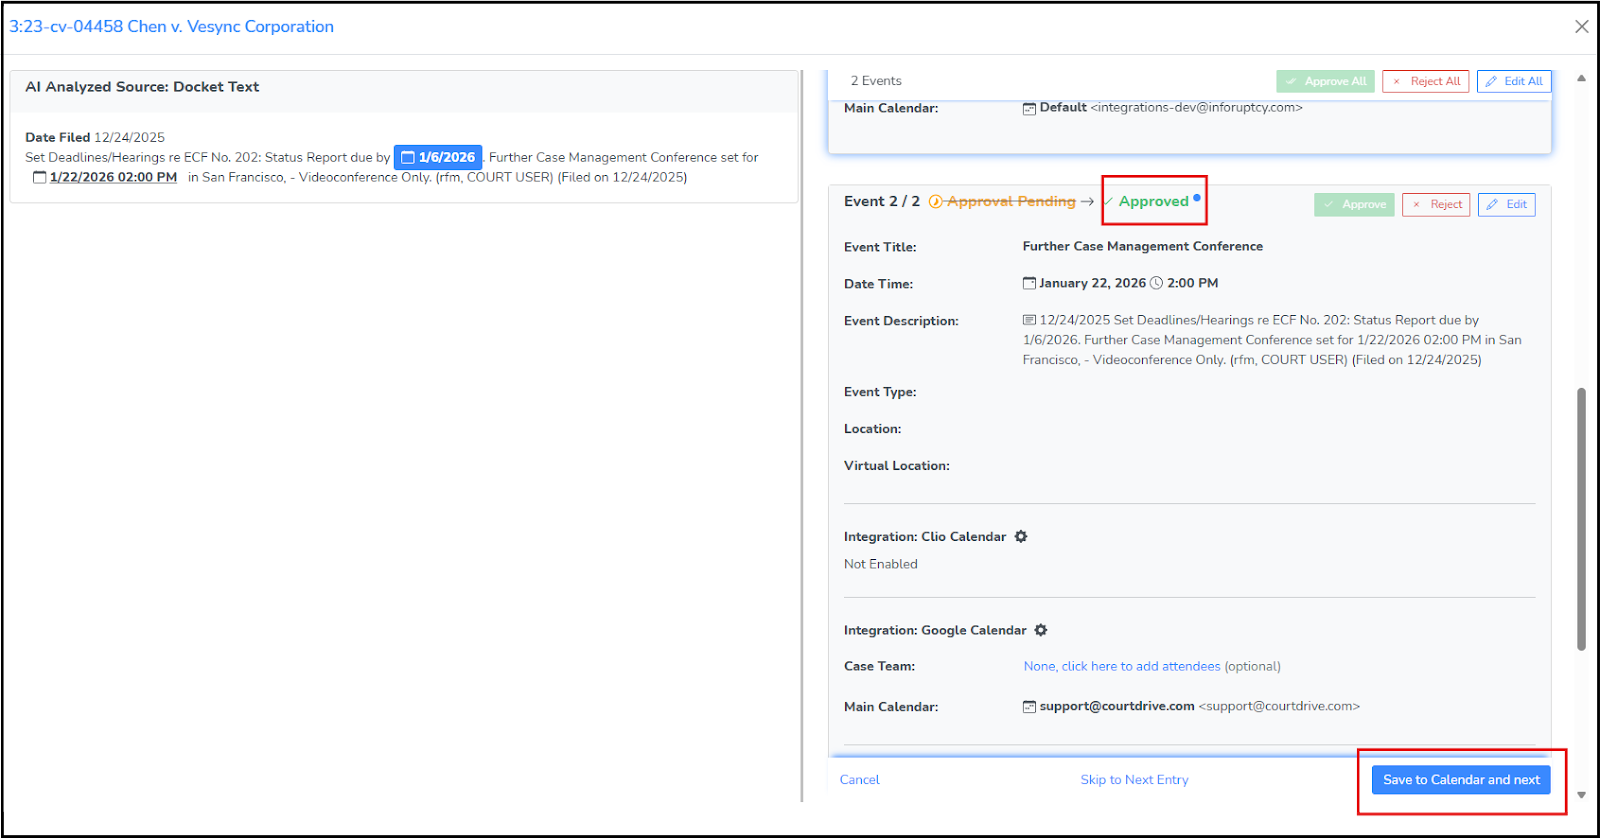
- This will:
- Save all edits
- Send approved events to the calendar
- Move the user to the next item in the Approval Queue
- Save all edits
Case-Level Calendar Options
For individual cases, you can configure additional options:
- Send calendar events to a specific case team in addition to the primary calendar

- For Clio Calendar and MyCase Calendar:
- Designate a specific matter per case
- Approved events will be linked directly to that matter
- Designate a specific matter per case
PDF Events (State Courts)
State court events are identified by AIDA through PDF scanning.
- PDFs are read and analyzed automatically
- Extracted events are sent to the Approval Queue
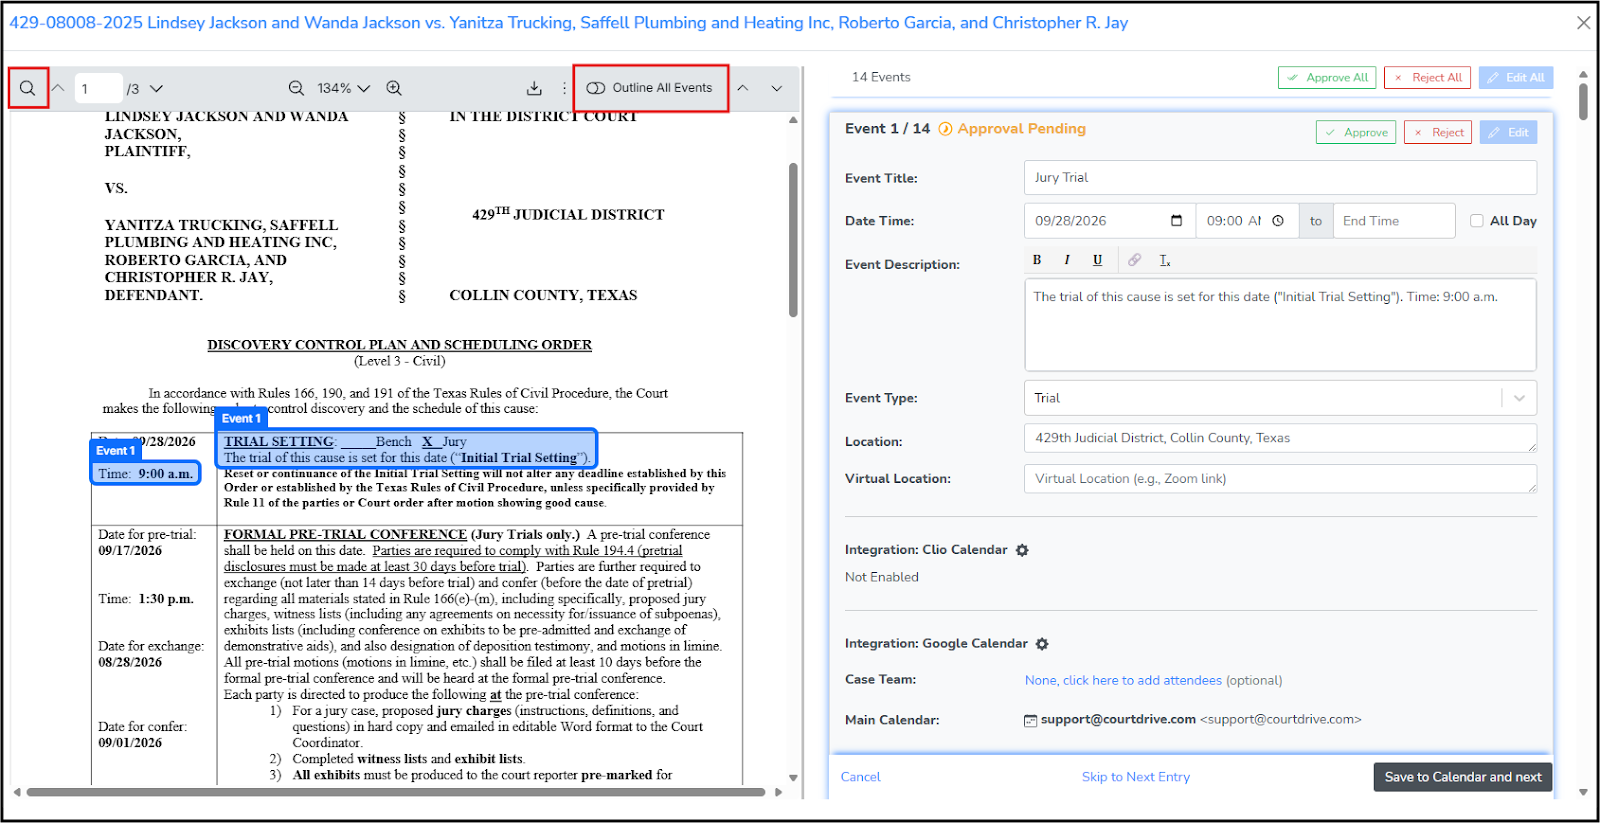
When reviewing PDF-based events:
- Selecting an event highlights where AIDA found it in the PDF
- The PDF automatically scrolls to the relevant section
- This allows for quick verification and review
Additional tools include:
- Search within the PDF
- Outline all events detected in the document
- Especially helpful when validating multiple deadlines or orders
Creating Custom Events
Users can also create events manually:
- Click Create Event at the bottom of the event window
- The event is linked to the selected case
- Calendar settings are automatically applied
This allows users to add custom or supplemental events without leaving CourtDrive or opening their calendar app.
Search and Filters
The Approval Queue includes powerful filtering tools to help users focus on what matters most. Users can filter by:
- Keywords or phrases
- Federal vs. State cases
- Specific Federal courts, regions, or State courts
- Case tags
- Individual cases or systems
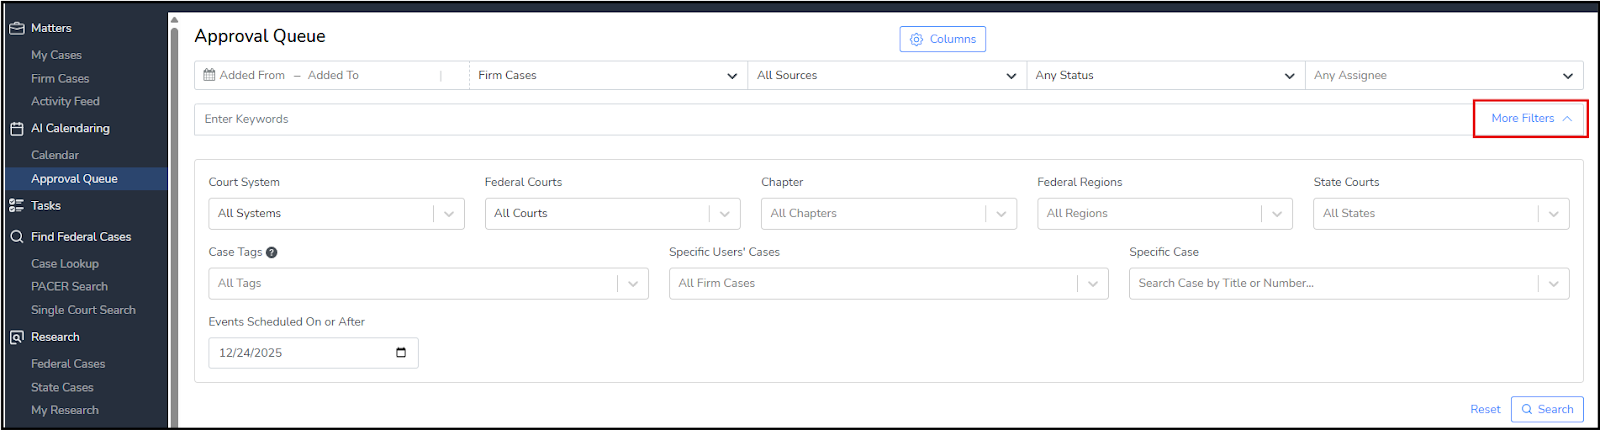
These filters provide flexibility and make it easy to manage high volumes of events efficiently.