PACER Account
The Admin is in charge of maintaining a valid PACER account and keeping track of PACER charges. All PACER charges are passed-through without markup.
PLEASE NOTE: You must use a general PACER account (also referred to as a "Case Search Only" account). The following types of accounts will NOT work:
- a CM/ECF "Filer" account that has filing privileges, or
- a PAA account used for billing purposes.
If you do not have a Case Search Only Pacer account, you can quickly get one here on PACER's website.
Add or Update Your PACER account
Follow these steps to add or update your PACER account:
- navigate to 'Settings' in the left navigation, and then 'PACER account' in the right (shown below)
- Enter your PACER credentials
- Click Save. You will receive confirmation of entering a valid PACER account
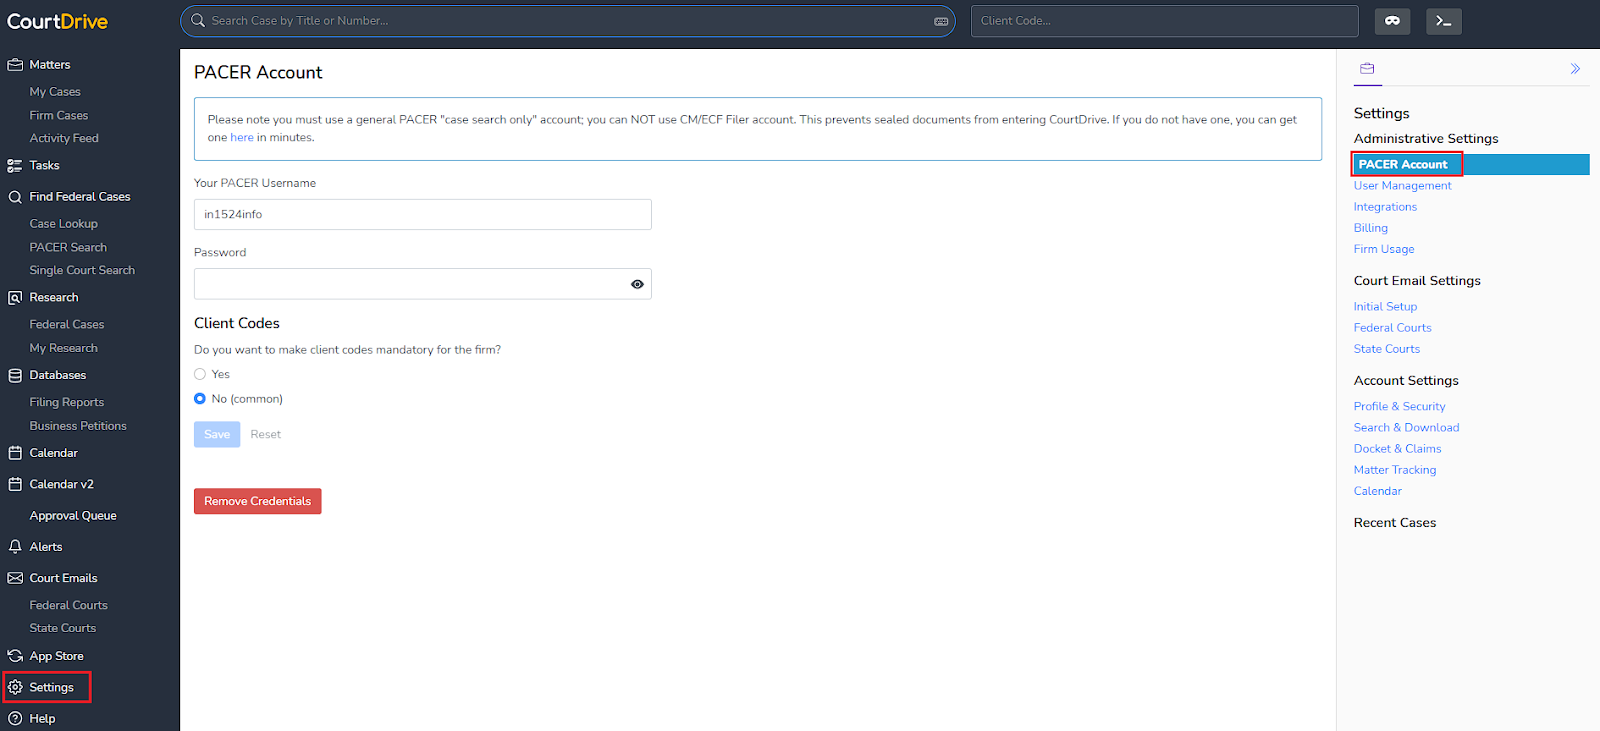
If your PACER account requires client codes
If you have configured your PACER account to require client/matter codes, your configuration options will be displayed on the page shown above. If you have not, you will still have the option of having CourtDrive require client codes in order to import data from PACER. Simply select your client code preference and click Save.
User Management
Every CourtDrive account has an "Owner." The Owner is the person who signed up and created the account. Owners have administrative control over the account and can add/remove users, and edit users' information and access privileges through the User Management screen. Owners can assign others to be Admin by editing their "role" shown further below. All Admins will have access to all the Admin settings discussed in this entire help article.
To access User Management:
- Click on “Settings” in the left navigation
- Click on "User Management" in the right navigation
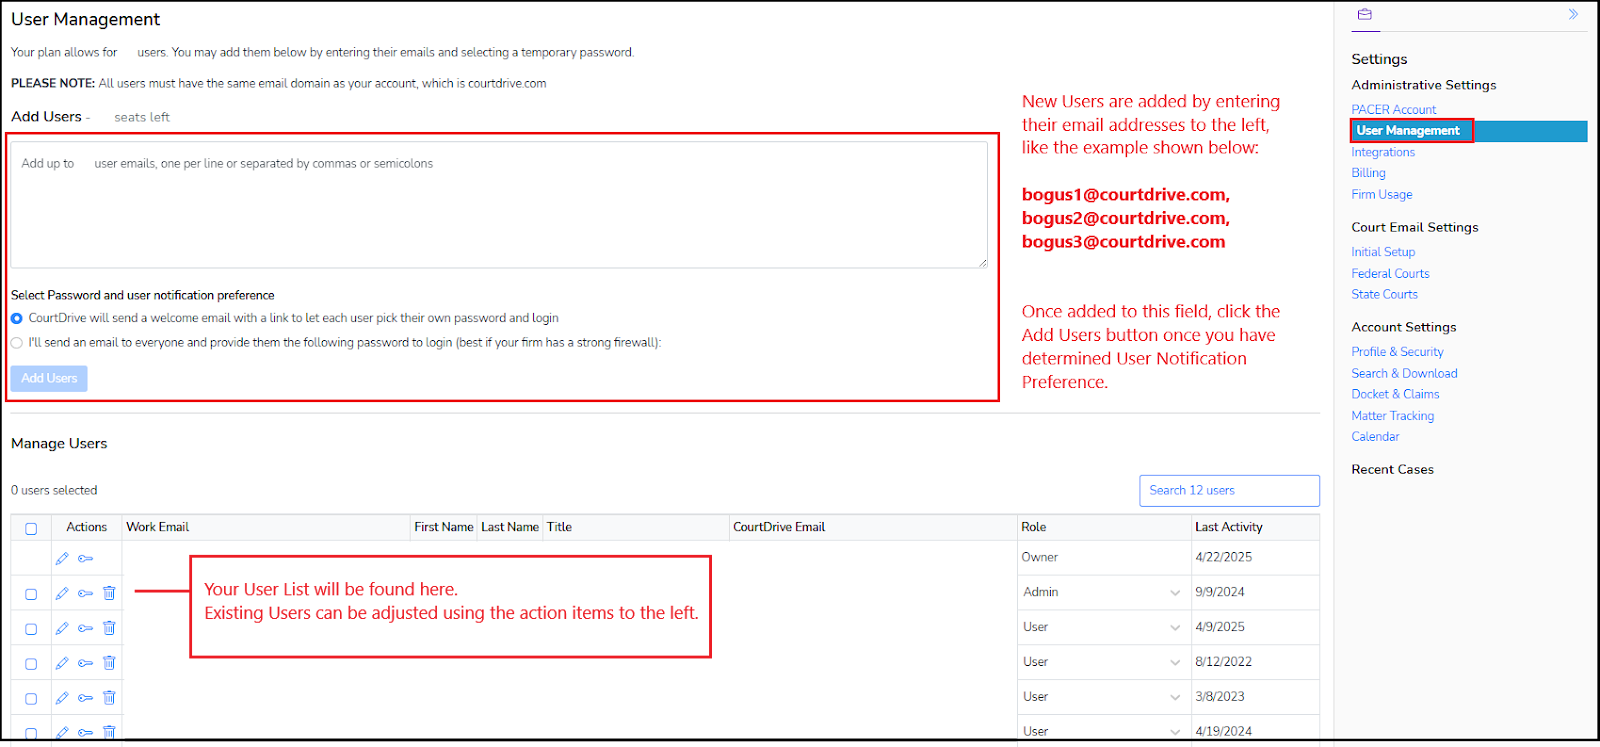
To add users, enter their email addresses, select password and user notification preference, and click “Add user.”
Depending on your notification preference, they will either be sent an invitation by email from CourtDrive or the Admin will need to notify them.
To remove a single user, click edit (the pencil icon) at the end of the row for that user. Then click "Delete user". You may also remove multiple users at once by selecting the checkboxes in front of each user you want to remove, then clicking the Remove users button at the top of the user list table.
As the Administrator, you can also edit users' names, emails, titles (attorney, paralegal, etc) and roles (Admin or User). Again, to edit a single user's information, click the edit icon at the end of the row for that user. To edit multiple users at once, simply click the checkbox next to each person and use the action buttons above the user list table.
PLEASE NOTE: The Owner can assign the role of Admin to anyone, and once that other user is an Admin, they will have all the same access and permissions as the Owner. Each account is limited to either 2 Admins (less than 20 user accounts) or 5 Admins (more than 20 user accounts).

Lastly, please note that you can edit a CourtDrive email address for a user as long as eNotices haven’t been received by that individual's account.
Integrations
Firm Admins can integrate third party Apps with CourtDrive for workflow automation such as automatically renaming and uploading PDFs to document / case management service providers. You can find a current list of available services in the App Store.
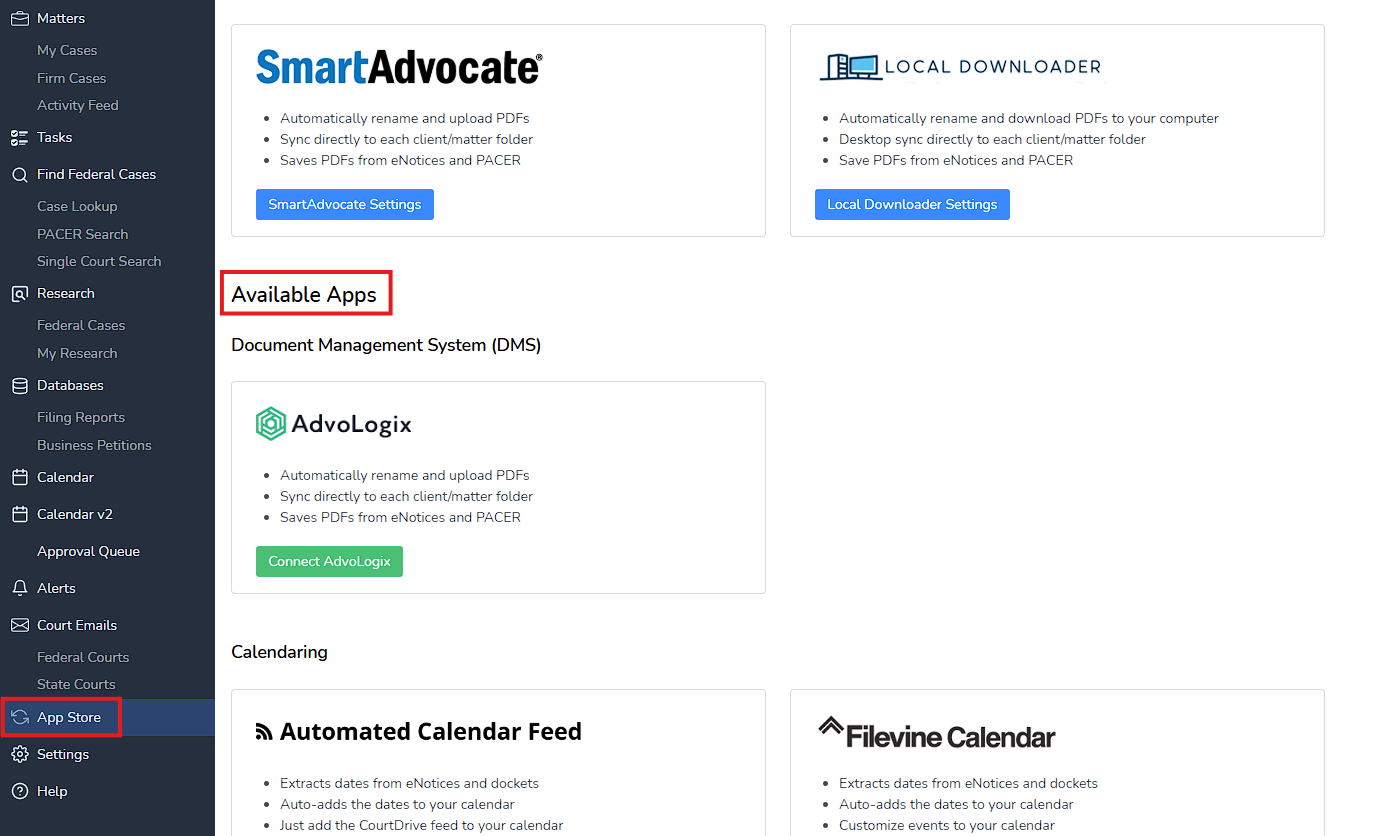
Just select the service you want to connect and follow the prompts to connect CourtDrive to your desired service.
Firm Usage
A spending report of the firm's usage is available for the Admin at any time, and in real time. Simply click on “Account Settings” in the left navigation and the “Firm Usage” in the right navigation. This will take you to the history page for the most recent month. You will see the usage details of all members of the corporate account.
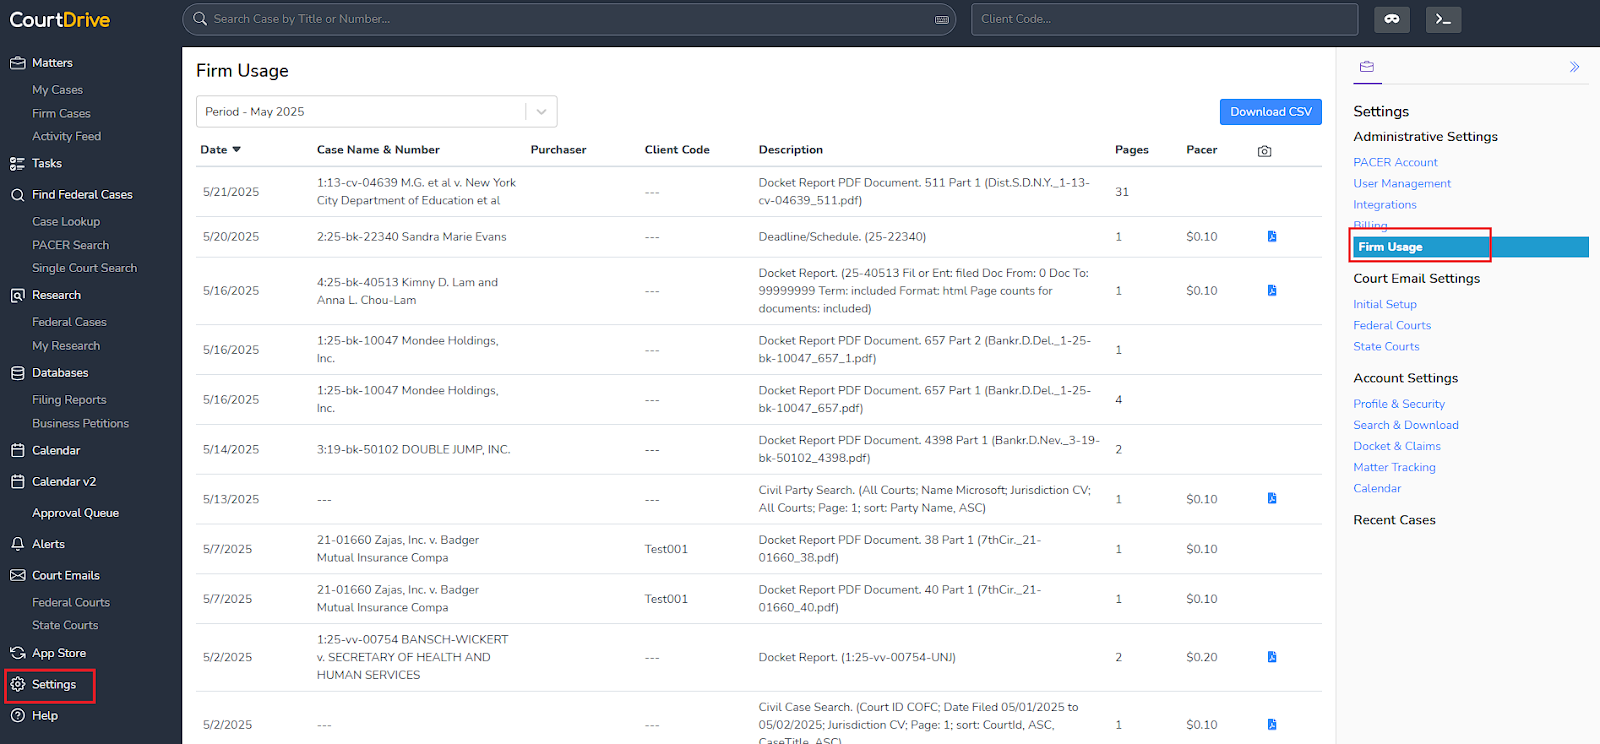
You can download a CSV file at any time to sort by client code, purchaser, or any other field available.
Billing
Topics covered:
- Subscription details
- Payment method (updating your credit card)
- Invoices
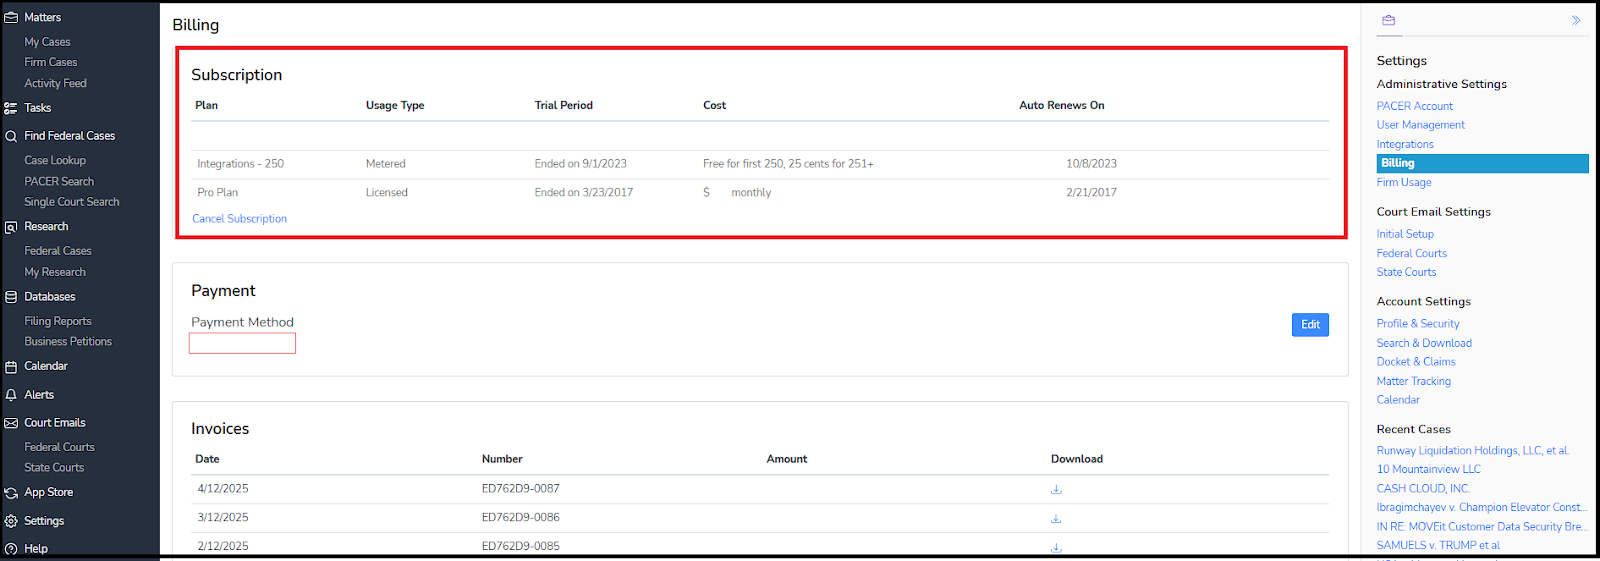
Billing details for the firm are available for the Admin at any time. Simply click on “Account Settings” in the left navigation and the “Billing” in the right navigation.
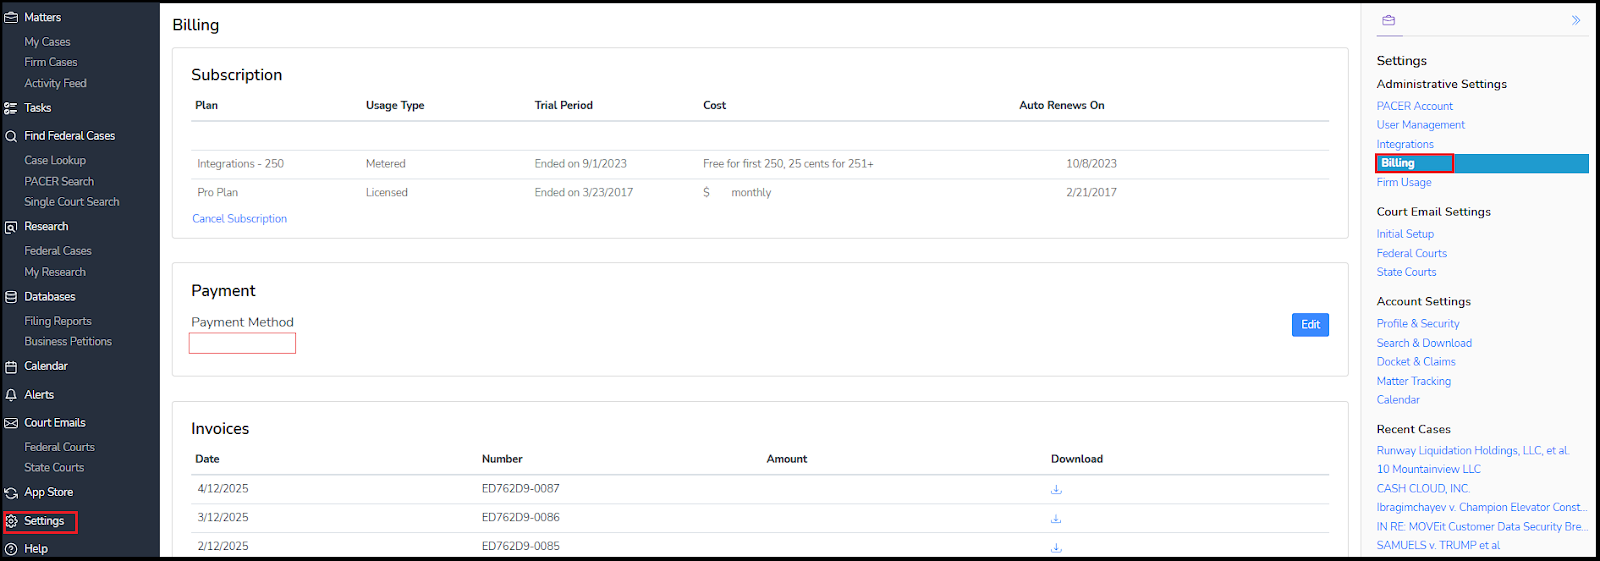
Your subscription details can be found below. You can cancel any time by clicking the “Cancel Subscription” link.
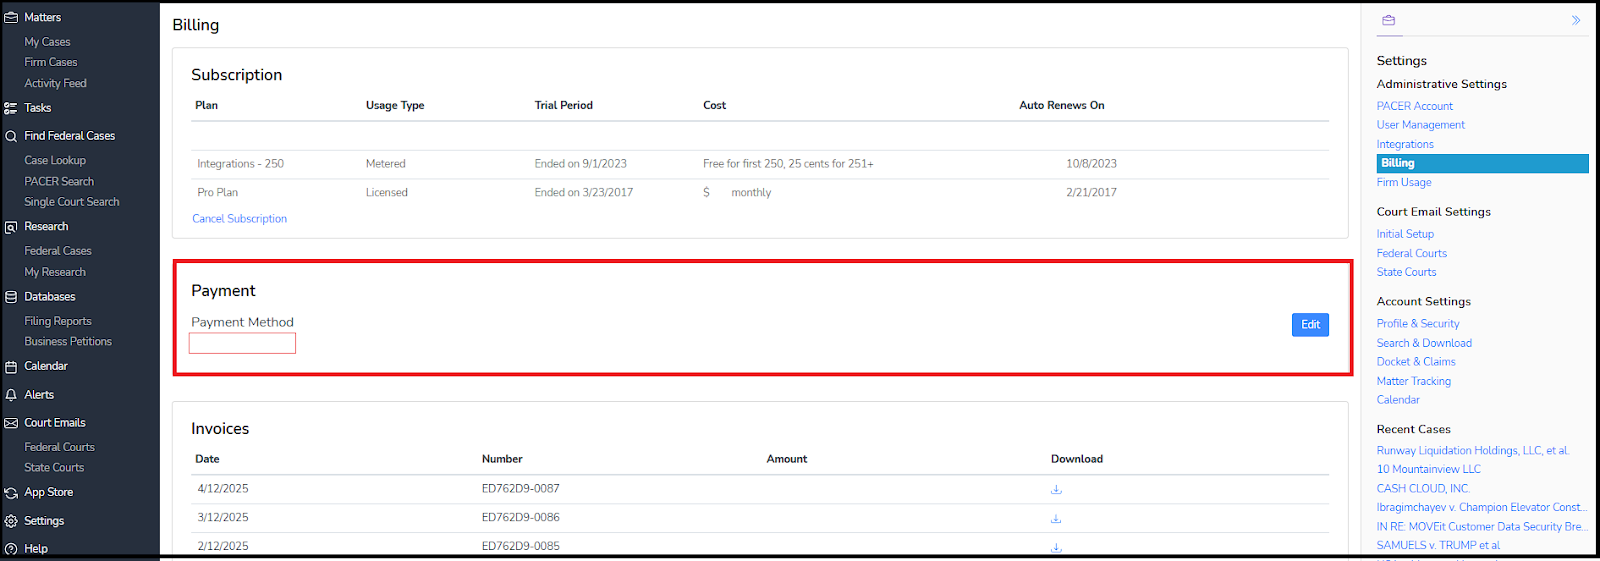
To update your credit card, you can click on the “Edit” button as shown below. Proceed to update your card information and click save. Please note: You must be the "Admin" for your firm in order to access the credit card update link.
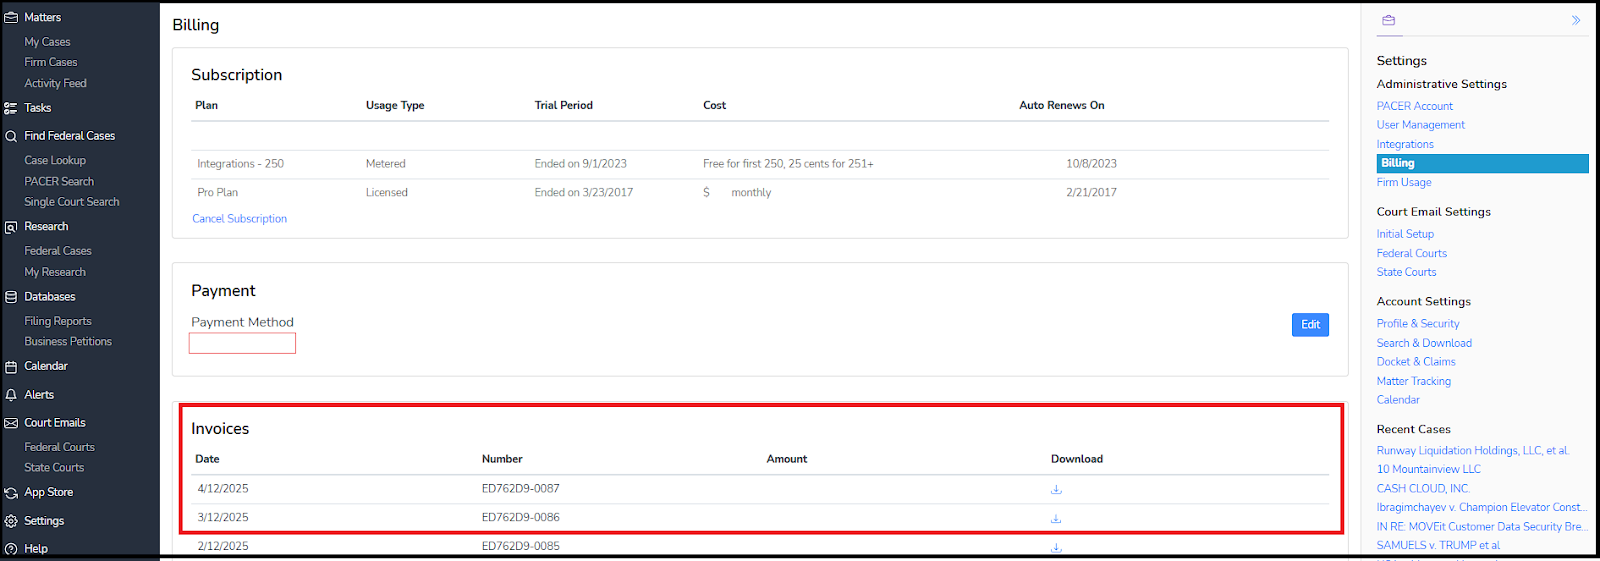
You can get a copy of your invoices any time by clicking the corresponding “Download” link as shown below.
Bulk Operations
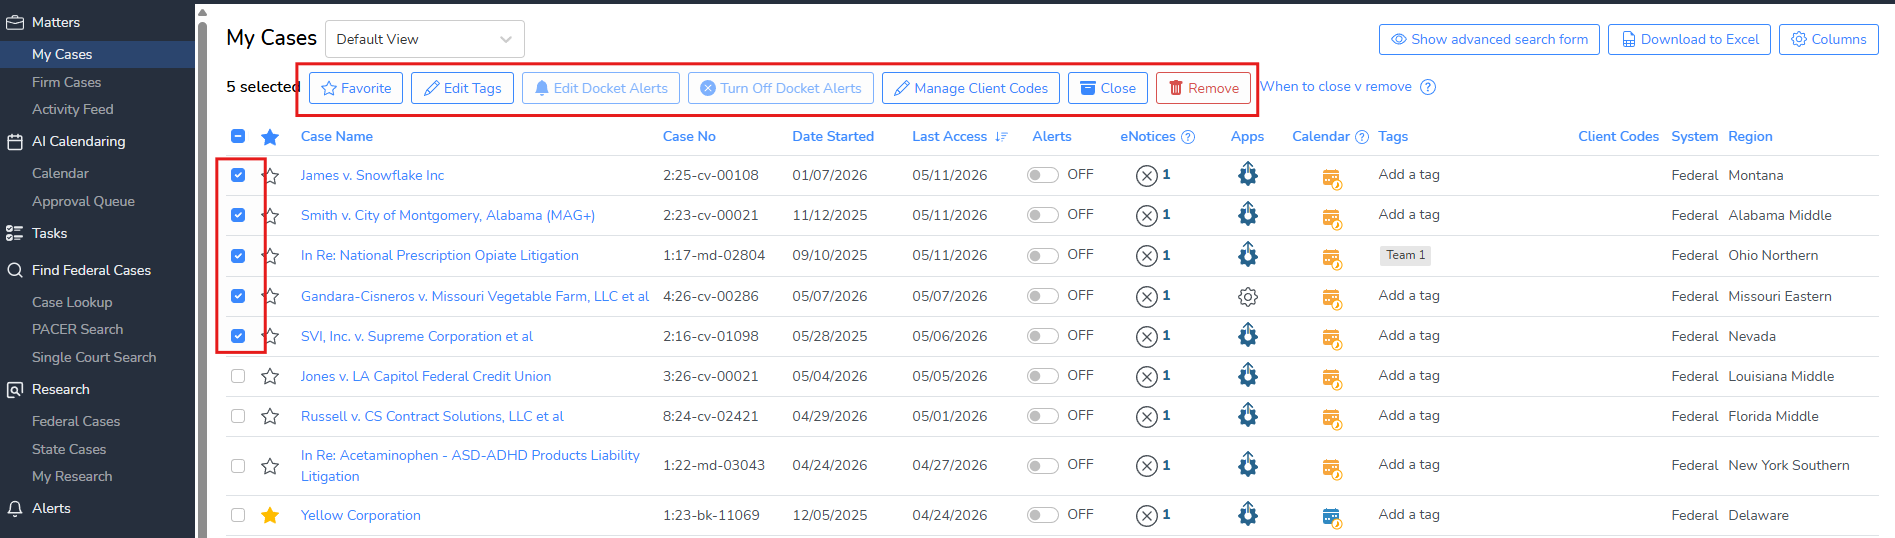
You can use the radio buttons present on the Firm Cases and My Cases lists to update specific cases en masse.
Select one or more cases using the radio button to the left-hand side. This will populate several update options at the top of the page, underneath the search bar.
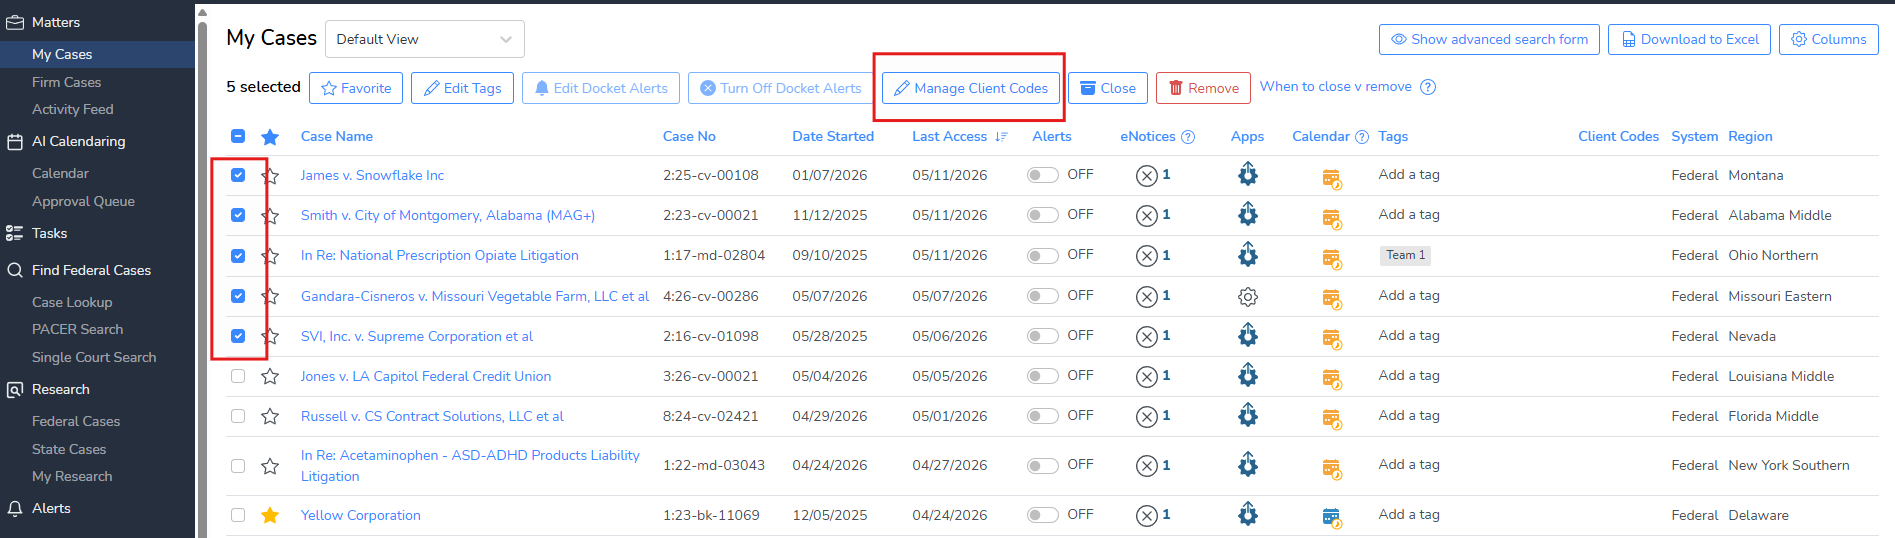
Client Codes
You can mass update Client Codes using your existing list via the Firm Cases and My Cases list. Select the radio button for the case(s) you wish to update, then click the ‘Manage Client Codes’ button at the top of the page:
From here you can update each case using the dropdown menu shown:
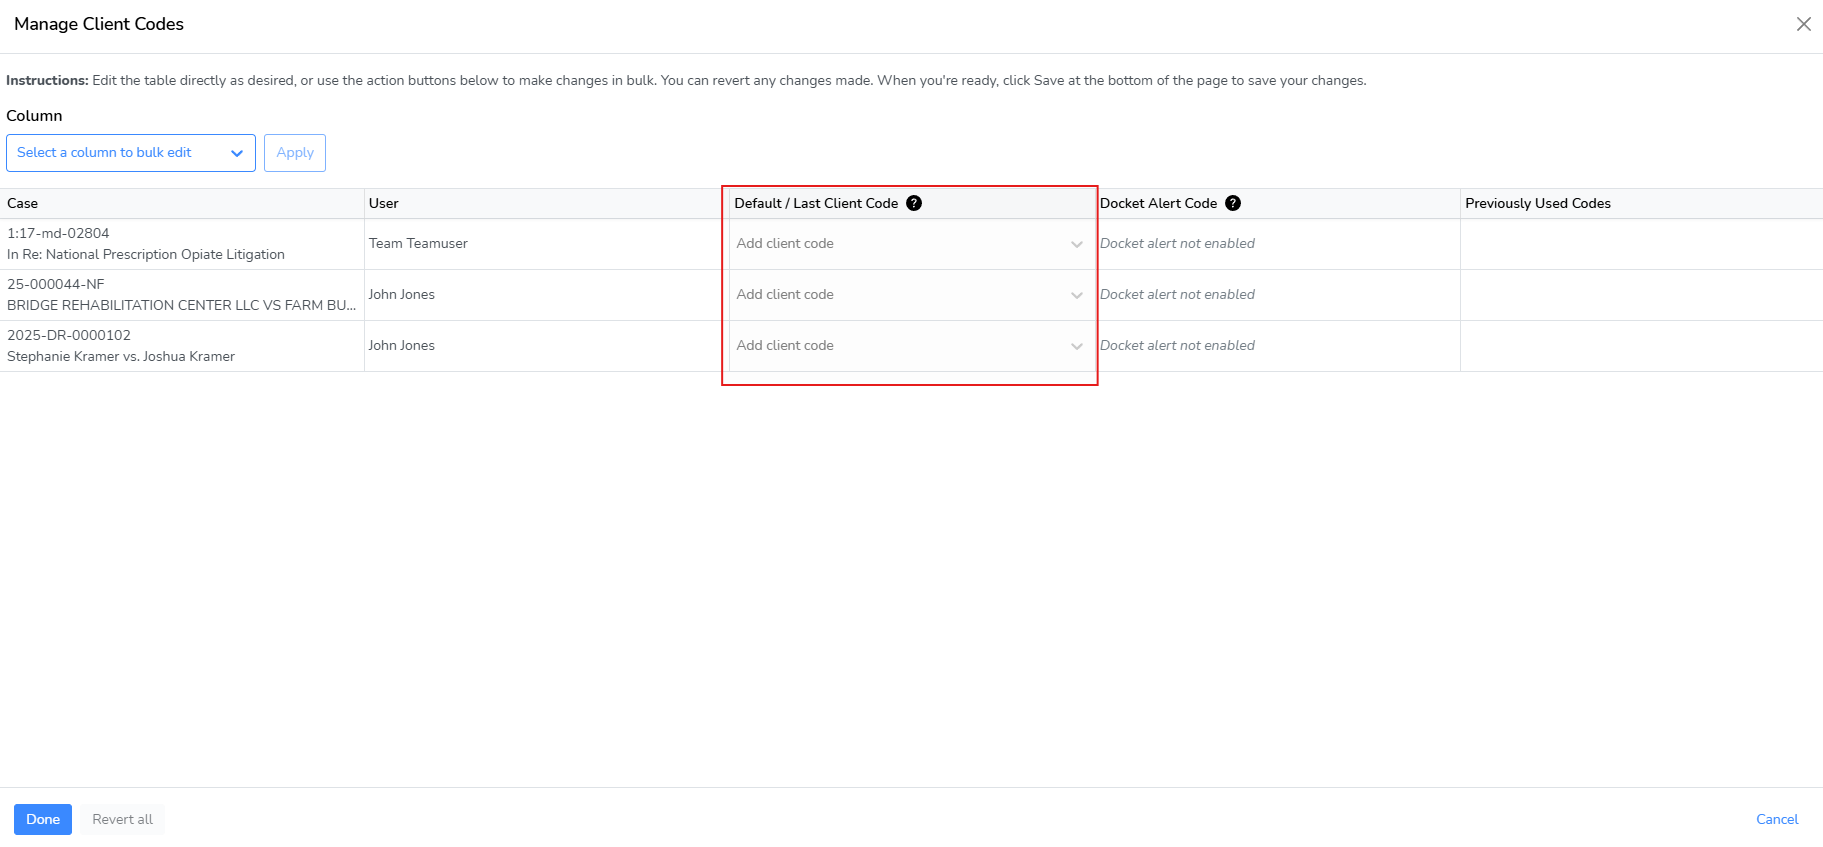
By typing into the dropdown, a user can also create a new Client Code, and apply it to the specific case.
Client codes saved on this page will be remembered without incurring any PACER expense and will auto-populate for the given case based on a user client code settings (found under Matter Tracking settings).
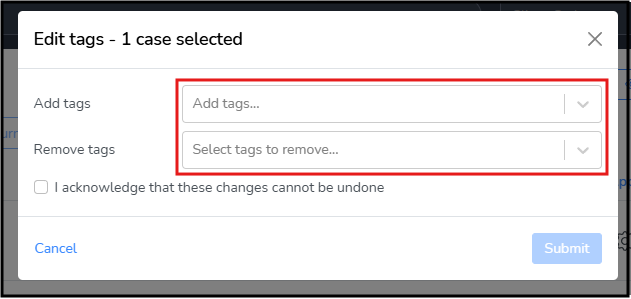
Edit Tags
The Edit Tags option will allow the user to bulk update tags, or remove tags, from the selected cases.
Edit Docket Alerts
The user can edit Docket Alerts en masse for all selected cases. Please note that you cannot choose this option if one or more selected cases does not already have a Docket Alert turned on.
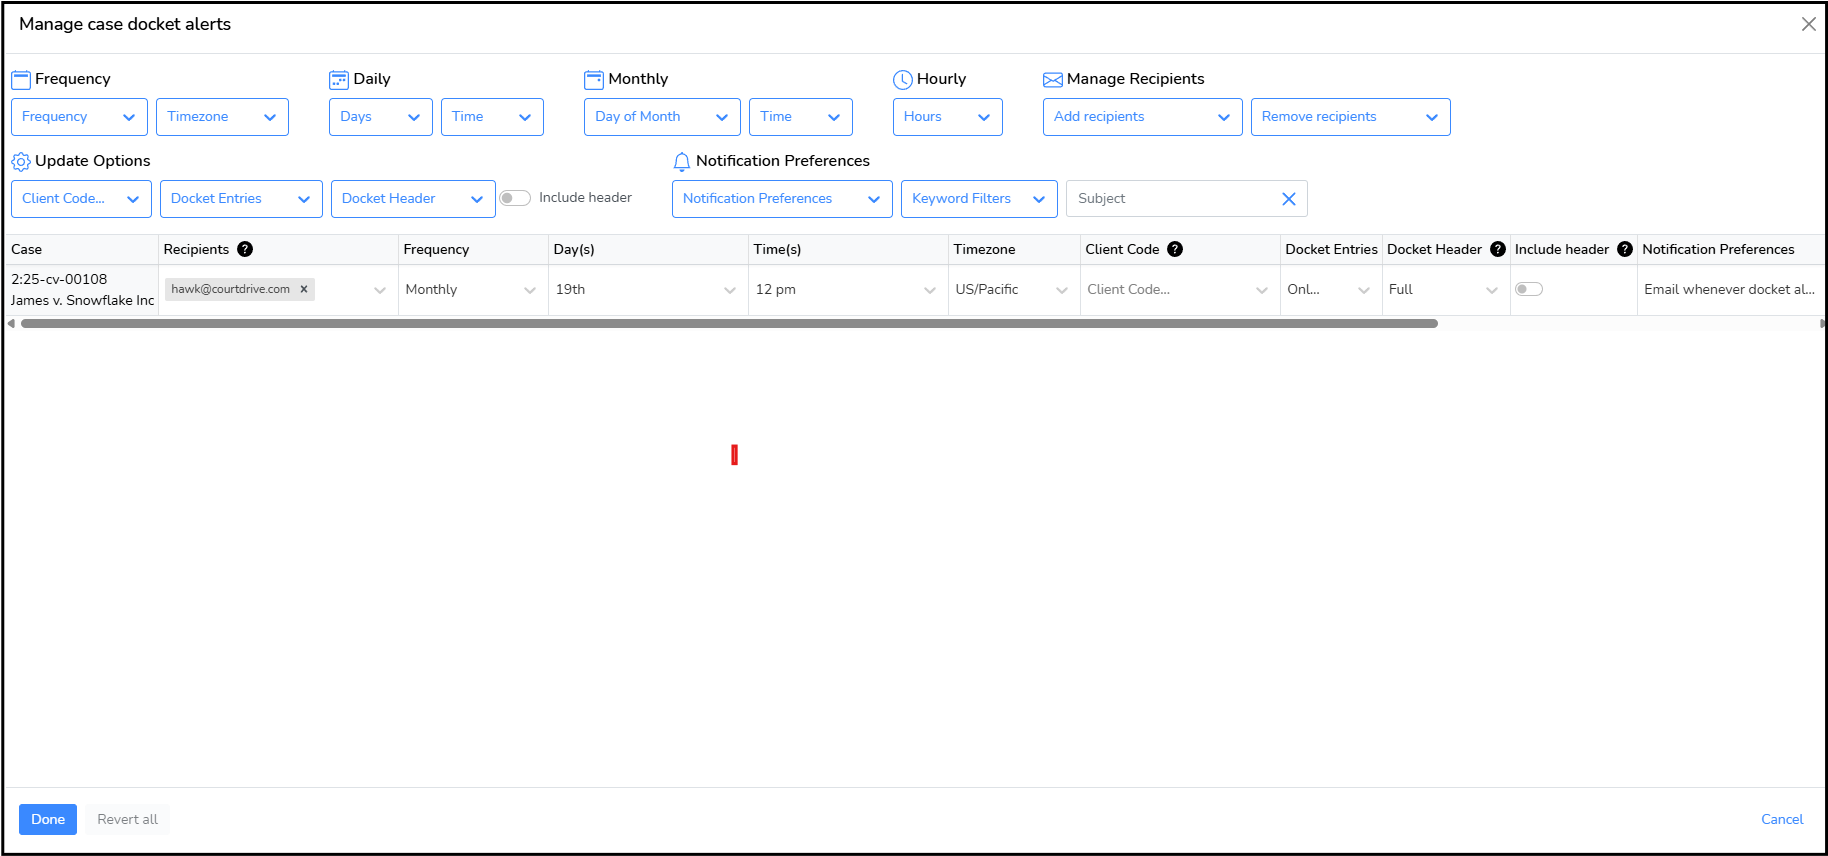
The user can update several areas at once, but some options will not affect the selected cases, depending on their existing settings. For example, changing an hourly time will not apply to any Docket Alert that is not on an Hourly setting.
Turn Off Docket Alerts
Users may also turn off Docket Alerts en masse.
